Breakfast & Brunch
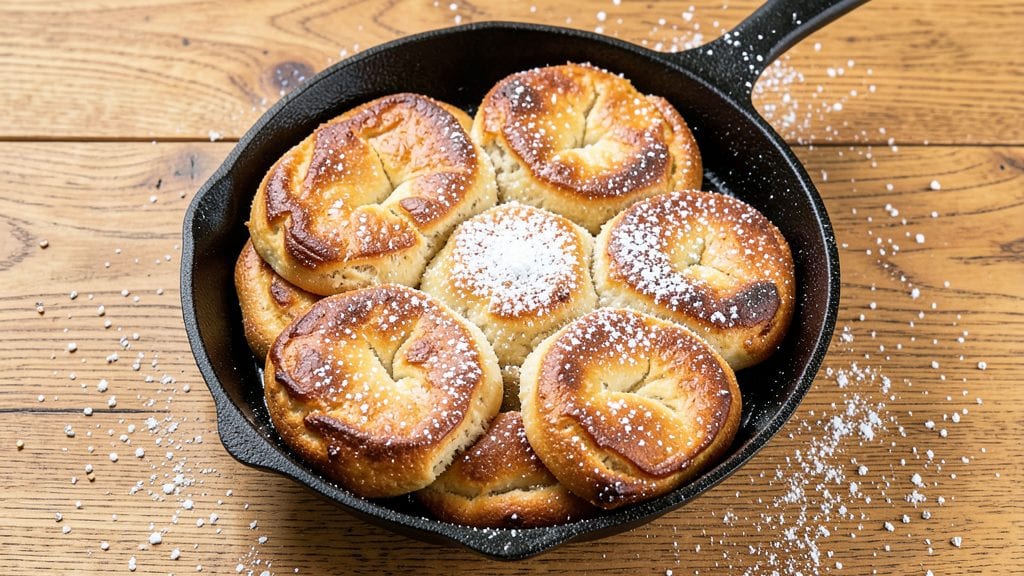
Arizona fry bread recipe brings a taste of Southwestern tradition to your kitchen with just four simple ingredients and a technique that's both satisfying and surprisingly easy.
This beloved Navajo/Diné dish transforms humble flour, water, salt, and lard into golden, fluffy handheld treats that soak up toppings like honey or jam with perfect ease.
I first discovered this recipe during a visit to the Navajo Nation, where it became a staple at family gatherings—simple enough for weeknights but rich with cultural significance.
The magic happens in the frying process, where the dough puffs into airy, pillowy rounds with crispy edges that stay tender inside. Traditional recipes use lard for authentic flavor, though modern adaptations often substitute vegetable shortening or even butter.
The dough comes together in minutes with just flour, water, and a pinch of salt, proving that comfort food doesn't need complicated techniques—just patience and a hot skillet.
What makes this recipe truly special is its versatility. Serve it warm with honey for a sweet breakfast treat, or dust with powdered sugar and cinnamon for a dessert that feels like a hug.
The dough's forgiving nature means even beginners can achieve perfect results, while the cultural roots add depth to every bite. This is comfort food at its finest—simple, satisfying, and deeply rooted in tradition.
Whether you're making it for a family meal or a special occasion, this Arizona fry bread delivers handheld comfort that's impossible to resist. The secret lies in the frying technique and the right toppings, which we'll cover in the instructions.
Let's get started on creating this classic dish that brings warmth to any table.
Ingredients for arizona fry bread
Four core ingredients transform into golden, fluffy fry bread with Southwestern tradition.
| Ingredient | Amount | Notes |
|---|---|---|
| All-Purpose Flour 🌾 | 4 cups | Unbleached preferred for traditional texture |
| Leaf Lard 🧈 | 1 cup | Traditional choice for authentic flavor |
| Vegetable Shortening 🧈 | 1 cup | Substitute if lard unavailable |
| Salt 🧂 | 1 tsp | Fine sea salt preferred |
| Warm Water 💧 | 1 ½ cups | 105-110°F for optimal dough |
| Powdered Sugar 🍚 | ½ cup | For optional topping |
| Honey 🍯 | ¼ cup | Wildflower preferred for serving |
| Cinnamon 🌿 | 1 tsp | Ground for dusting |
The lard is non-negotiable for authentic flavor—leaf lard from Whole Foods or Costco delivers that rich, traditional taste. If unavailable, vegetable shortening works perfectly for modern adaptations. The flour should be unbleached all-purpose—bleached varieties can make the dough slightly tougher. For the water, warm (105-110°F) is ideal—just hot enough to dissolve the salt but not so hot it cooks the dough. King Arthur or Gold Medal brands are my go-tos for consistent results. Store your lard in the fridge to maintain freshness, and keep flour in an airtight container to prevent absorption of kitchen odors.
No lard? Vegetable shortening or even butter will work in a pinch, though the texture may differ slightly. The warm water is critical—cold water can make the dough too stiff, while boiling water will cook it prematurely. For the optional toppings, local honey adds depth, but any honey will do. If you prefer sweetness without honey, maple syrup or jam are excellent alternatives. The cinnamon should be ground—pre-ground is fine, but avoid whole sticks unless you're grinding them yourself. For a savory twist, skip the sugar and serve with refried beans or scrambled eggs instead.
This dough keeps in the fridge for up to 3 days if wrapped tightly in plastic. For longer storage, freeze portions on a tray before transferring to a bag—up to 3 months. The fried bread reheats beautifully in a 350°F oven for 5-7 minutes, making it perfect for meal prep. Serve immediately after frying for that signature crispy-yet-tender texture. Leftover dough can be reheated in a skillet for 2-3 minutes per side until golden again.
Why You'll Love This Recipe
- Five-Ingredient Magic: I swear by this combo—flour, lard, shortening, salt, and water. That rich fat blend (lard + shortening) gives it a crispy shell and tender inside that’s impossible to resist. No fancy ingredients, just pure comfort.
- Crispy Without Fuss: Here’s what sold me—frying small batches in hot oil for just 2-3 minutes each. The edges get that golden, shatter-like crunch while staying soft inside. No flipping drama, no waiting for the whole batch.
- Endless Topping Play: Breakfast? Slather it with honey and cinnamon. Dinner? Load it with beans, cheese, and salsa. Even dessert works—powdered sugar and whipped cream. It’s my blank canvas for lazy or fancy meals.
- Budget-Friendly Staple: A single batch feeds four, and leftovers reheat perfectly in the oven. Honestly, I make this when I’m broke or hosting—same result. The lard might sound fancy, but it stretches further than butter, and flour? Always on hand.
Step-by-step instructions for Arizona fry bread
This method delivers light, airy fry bread with a crisp exterior and tender interior—just like the classic comfort food.
Mix the Dough Ingredients
In a large mixing bowl, combine the 4 cups all-purpose flour, 1 cup leaf lard, 1 cup vegetable shortening, and 1 teaspoon salt. I use my hands to work the fat into the flour until it resembles coarse crumbs with pea-sized pieces remaining. This texture is crucial—it ensures the bread will be tender rather than dense. If using your fingers feels messy, a pastry cutter works just as well.
Next, gradually add the 1.5 cups warm water while mixing with a wooden spoon. The dough will begin to come together, but don't worry if it looks shaggy at first. Mix just until the dough forms a soft, slightly sticky ball that pulls away from the sides of the bowl. Overmixing develops gluten, which can make the bread tough. Stop mixing as soon as the dough holds together when pressed gently.
Knead and Shape the Dough
Turn the dough onto a lightly floured surface and knead it gently for about 2 minutes, just until smooth. You're not trying to develop gluten here—this is a minimal knead to ensure even texture. Divide the dough into 12 equal pieces, each about the size of a small egg. Roll each piece into a ball and flatten slightly to about ½-inch thickness. The dough should be soft but not sticky—if it sticks, wet your hands slightly to prevent tearing.
This is where the magic happens: cover the shaped dough with a clean kitchen towel and let it rest for 10 minutes. This brief rest allows the gluten to relax slightly, making the bread easier to handle and preventing it from shrinking back when you fry it. Don't skip this step—it makes all the difference in getting that perfect, airy texture.
Fry the Bread to Golden Perfection
Heat about ½ inch of vegetable oil in a large skillet over medium-high heat until it reaches 350°F. You'll know it's ready when a small piece of dough sizzles vigorously when dropped in. Working in batches to avoid crowding, carefully place 3-4 dough pieces into the hot oil. Fry for 2-3 minutes per side, until golden brown with a few small bubbles forming on the surface. The bread should puff up slightly as it cooks—this indicates it's cooking properly.
Use a slotted spatula to flip the bread carefully, pressing down gently to ensure even browning. Don't overcrowd the pan, or the oil temperature will drop and the bread will absorb too much oil instead of getting crispy. Transfer the fried bread to a paper towel-lined plate to drain excess oil. Repeat with the remaining dough, maintaining the oil temperature between 340°F and 360°F for best results.
Serve Warm with Classic Toppings
While still warm, brush the tops of the fry bread with a mixture of 0.5 cup powdered sugar and 0.25 cup honey. Dust lightly with 1 teaspoon cinnamon for that authentic Arizona touch. Serve immediately—the bread is best enjoyed fresh and warm, with toppings like honey, powdered sugar, jam, or even a sprinkle of cinnamon. The contrast of the crisp exterior and soft interior makes every bite satisfying.
For extra authenticity, serve with a side of honey or a dollop of whipped cream. The simplicity of this recipe is what makes it so comforting—just a few basic ingredients transformed into a handheld treat that brings back memories of Southwestern comfort food. Store any leftovers in an airtight container for up to 2 days, but they're best enjoyed fresh from the fryer.
Pro Tips For Making Arizona Fry Bread
- Use Cold Shortening: I learned this the hard way—mixing leaf lard and vegetable shortening straight from the fridge makes the dough flaky instead of greasy. The cold fat creates pockets that puff the bread like a dream, while room-temperature fat just makes it dense. (Yes, even if you're impatient like me.)
- Salt the Water: Skip the dry salt in the dough—dissolve that pinch in the warm water instead. This guarantees even distribution, so every bite has that subtle, consistent flavor. I used to eyeball it in the flour, and some pieces always tasted bland.
- Fry in Batches of Three: Crowding the pan turns your fry bread into a soggy mess. Three at a time is the sweet spot—enough to keep the oil hot but not so many that they steam instead of crisp. After burning three batches, I finally figured out the oil needs to stay at 375°F, not simmer.
- Stretch, Don’t Roll: Resist the urge to roll out the dough—stretching it by hand gives that signature thick, uneven edge. Press the center gently, then let it naturally puff as it hits the oil. This isn’t the prettiest method, but it’s the tastiest. (Your future self will thank you.)
Flavor customization for this recipe
Sweet & Classic
Start with the traditional sweet version by brushing warm fry bread with ¼ cup melted butter and dusting generously with ½ cup powdered sugar. I like to add 1 tsp cinnamon for warmth, then drizzle with 2 tbsp local honey or warm maple syrup.
For extra decadence, top with a dollop of whipped cream or a scoop of vanilla ice cream. This combination brings back memories of Navajo Nation gatherings where sweet toppings were always a staple. 🍯
Savory Breakfast Twist
Swap sweet toppings for savory flavors by serving with refried beans and scrambled eggs. I like to add ½ cup crumbled bacon or sautéed onions for extra depth.
For a Tex-Mex fusion, spread refried beans on half the fry bread, top with shredded cheese, and fold—this creates a handheld breakfast burrito. The crispy edges contrast perfectly with the soft, warm fillings. 🍳
Spiced & Warm
Infuse warmth by mixing 1 tbsp ground cumin and ½ tsp cayenne pepper into the dough before frying. After cooking, brush with 2 tbsp melted butter> and sprinkle with ½ cup crumbled feta cheese or chopped cilantro.
This spiced version pairs beautifully with spicy salsa or avocado slices. The cumin adds earthy depth while the cayenne gives a subtle kick—perfect for those who love bold flavors. 🌶️
Dessert Variations
For a dessert version, add ½ cup finely chopped pecans or chopped walnuts to the dough before frying. After cooking, drizzle with warm caramel sauce or chocolate ganache.
I also love adding 1 tsp vanilla extract to the dough for extra richness. These nutty, sweet variations make fry bread a perfect after-dinner treat or dessert. 🍫
Herbed & Garlicky
Elevate savory fry bread by mixing 2 minced garlic cloves and 1 tbsp chopped fresh rosemary into the dough. After frying, brush with 2 tbsp olive oil> and sprinkle with sea salt and black pepper.
This herbed version pairs wonderfully with roasted vegetables or a Mediterranean-style salad. The garlic and rosemary add a fragrant twist to the classic dish. 🌿
Kid-Friendly Fun
Let kids customize their own fry bread by setting out small bowls of toppings like sprinkles, crushed cookies, mini chocolate chips, and fruit jam. I often use this as a fun activity during family gatherings—it’s a hit with kids and adults alike.
The simplicity of the dough makes it easy for little hands to shape and fry (with supervision, of course!). 🧒
Nutrition facts
Frequently asked questions
Why does traditional Arizona fry bread use lard instead of butter or oil?
Lard provides that authentic, rich flavor deeply rooted in Navajo/Diné cuisine. Its higher fat content creates the perfect crispy-yet-tender texture, while butter can burn too quickly and vegetable oils lack that traditional depth. For a modern substitute, vegetable shortening mimics lard's performance best.
Can I make the dough ahead of time?
The dough keeps well in the fridge for up to 3 days when wrapped tightly in plastic. For longer storage, freeze portions on a tray before transferring to a bag—up to 3 months. Thaw overnight in the refrigerator before frying for best results.
What's the best way to keep fry bread crispy?
Fry bread stays crispier when served immediately after cooking. If reheating, use a 350°F oven for 5-7 minutes or a skillet for 2-3 minutes per side. Store in an airtight container with a paper towel to absorb moisture, but enjoy fresh for that signature crunch.
Can I make this recipe gluten-free?
Traditional fry bread requires wheat flour, but you can adapt it using a 1:1 gluten-free flour blend like Bob's Red Mill. The texture will be slightly denser, but the technique remains the same. Add ½ tsp xanthan gum if your blend doesn't contain it.
What's the cultural significance of Arizona fry bread?
Originally created by Navajo/Diné people during the Long Walk of 1864, fry bread became a symbol of resilience. It represents survival and adaptation, now enjoyed worldwide as both a traditional dish and modern comfort food. Many Native American communities still serve it at gatherings and ceremonies.