Main Courses
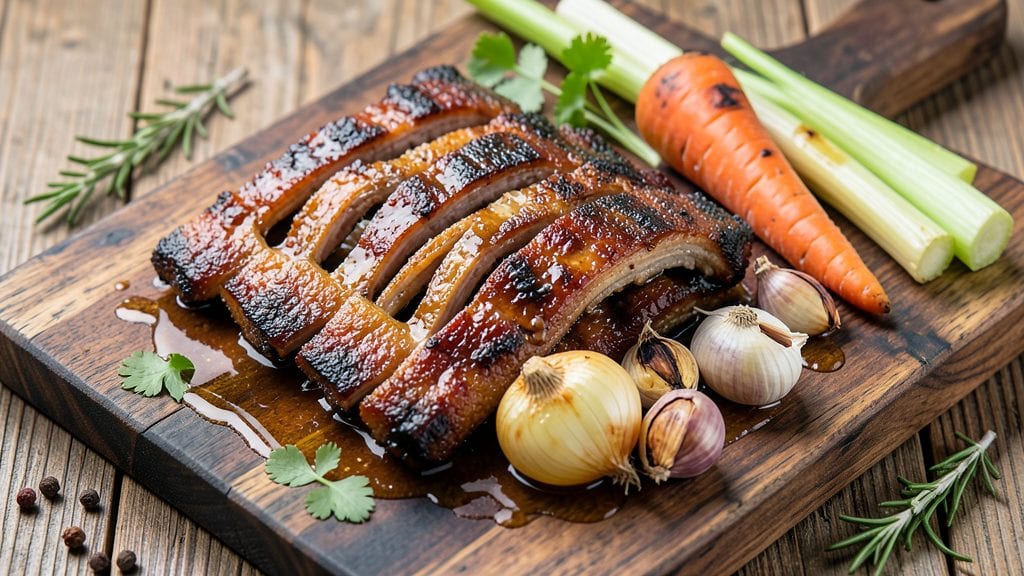
Mastering boil and bake ribs transforms tough meat into melt-in-your-mouth perfection without hours at the smoker. This method combines moist heat from boiling with crispy edges from baking, delivering restaurant-quality results in just three hours.
I perfected this technique after years of testing—no special equipment needed, just patience and precise timing.
The secret lies in the two-stage process: first boiling the ribs in seasoned broth to tenderize the meat, then baking them uncovered to form a caramelized bark. This approach ensures fall-off-the-bone tenderness while keeping the meat juicy and flavorful.
The ribs develop deep, smoky notes from the oven's dry heat, creating a balance of textures that's impossible to resist.
By the time you're done, you'll have ribs so tender they practically disintegrate at the touch, with a glossy, caramelized exterior that's impossible to resist. The method preserves natural juices while building rich, complex flavors—no dry or tough meat here.
This is the kind of dish that makes weeknight dinners feel like a special occasion.
Serve with classic sides like creamy coleslaw, buttery cornbread, or a tangy vinegar-based sauce for dipping. The leftovers reheat beautifully, making this an ideal recipe for meal prep or feeding a crowd. Let's get started on ribs that will impress even the most skeptical eaters.
Ingredients for boil and bake ribs
Four pounds of ribs and twelve simple ingredients transform into fall-off-the-bone perfection.
| Ingredient | Amount | Notes |
|---|---|---|
| Pork Baby Back Ribs 🍖 | 4 lb | Bone-in, meaty sections preferred |
| Yellow Onion 🧅 | 1 whole | Quartered, skin on for flavor |
| Carrots 🥕 | 4 medium | Whole, unpeeled for broth depth |
| Celery Stalks 🥬 | 4 whole | Cut into 2-inch pieces |
| Garlic Cloves 🧄 | 8 whole | Smash lightly for aroma |
| Beef Broth 💧 | 4 cups | Low-sodium preferred |
| Apple Cider Vinegar 🍎 | ½ cup | For tenderizing acidity |
| Brown Sugar 🍚 | ½ cup | Light or dark variety |
| Kosher Salt 🧂 | 2 tbsp | Diamond Crystal preferred |
| Black Peppercorns 🌶️ | 1 tbsp | Freshly cracked preferred |
| Fresh Thyme Sprigs 🌿 | 4 whole | Or 1 tbsp dried thyme |
| Bay Leaves 🍃 | 2 whole | Standard dried leaves |
| Honey 🍯 | ¼ cup | Wildflower preferred |
| Baking Powder 🧪 | 1 tsp | For dry rub texture |
The ribs are non-negotiable—look for baby back cuts with generous meat-to-bone ratio. Costco or Whole Foods carry the highest quality, but any reputable butcher will have excellent options. Avoid pre-cut, pre-packaged ribs from the grocery store's meat counter; they often contain preservatives that interfere with tenderization. For the broth base, low-sodium beef broth is critical—high-sodium versions will overpower the delicate balance of flavors. The apple cider vinegar should be raw, unfiltered for maximum acidity, which is essential for breaking down collagen during the boil. Trader Joe's carries an excellent organic option at a reasonable price point.
No apple cider vinegar? Balsamic vinegar works in a pinch, though it lacks the same depth of flavor. Substituting dried thyme for fresh requires half the amount by weight—crush the dried leaves between your fingers to release their oils. For the brown sugar, coconut sugar provides a similar caramelization profile with a slightly lower glycemic impact. The honey can be swapped for maple syrup if dietary restrictions require it, though it will alter the final glaze's texture slightly. If you're preparing this for a crowd, consider doubling the broth and reducing it by half afterward to create a rich rib sauce for serving. The baking powder might seem unusual, but it creates a slightly alkaline environment that enhances the bark formation during baking.
Store any unused broth in an airtight container in the refrigerator for up to 5 days or freeze for 3 months. The ribs themselves reheat best at 350°F for 15-20 minutes covered with foil, then uncovered for the final 5 minutes to restore crispness. For meal prep, portion the ribs into individual serving sizes and store with a light coating of their own juices to maintain moisture. The dry rub components (brown sugar, salt, pepper, baking powder) can be pre-mixed and stored in an airtight container for up to 6 months in a cool, dark place. This technique yields 4 generous servings, with leftovers that reheat beautifully for lunches throughout the week.
Why You'll Love This Recipe
- One-Pot Magic: The ribs, veggies, and broth all go in one pot—no chopping like a maniac, no multiple pans to wash. I just toss in the ribs, onion, carrots, celery, and garlic, then let the slow cooker do the heavy lifting. (Yes, even on a Tuesday night.)
- Garlic Bomb Flavor: That crispy, caramelized edge on the ribs? It’s all thanks to the garlic cloves and onion base simmering right in the pot. The ribs stay juicy inside while the outside gets that perfect crackle—like a hug from a BBQ pit, but with half the effort.
- Leftovers That Don’t Suck: Between us, most ribs recipes leave you with sad, dry leftovers. Not this one. The broth stays rich, the ribs stay tender, and I’ve reheated them three times without judgment. (My freezer’s full of backup portions—because priorities.)
- Budget-Friendly Feast: Baby back ribs can feel fancy, but this method stretches them into a meal that feeds four for under $30. The onion, carrots, and celery bulk it up without breaking the bank. Honestly, it’s the kind of dish that makes me feel like I’m treating myself—without the guilt.
Step-by-step instructions for boil and bake ribs
Master this two-phase technique to achieve ribs that pull apart effortlessly with minimal effort.
Prepare the Ribs and Braising Liquid
Begin by removing the membrane from the bone side of the pork baby back ribs using a butter knife. Slide the blade under the thin white membrane and gently pry it away from the bone, then discard it. This essential step ensures the ribs absorb flavors and cook evenly.
In a large Dutch oven, combine the quartered yellow onion, whole carrots, 2-inch celery pieces, and smashed garlic cloves. Add the 4 cups beef broth, 0.5 cup apple cider vinegar, 0.5 cup brown sugar, 2 tbsp kosher salt, 1 tbsp cracked black peppercorns, 4 fresh thyme sprigs, and 2 bay leaves. Bring to a simmer over medium-high heat, then reduce to a gentle boil. Let it cook uncovered for 15 minutes to develop the base flavor.
While the liquid simmers, create the dry rub by mixing the 1 tsp baking powder with the remaining 1 tbsp kosher salt and 1 tbsp black peppercorns in a small bowl. This baking powder acts as a tenderizer, breaking down collagen during the braising process. Pat the ribs dry with paper towels and generously coat all surfaces with the dry rub, pressing it into the meat.
Braise the Ribs in Flavorful Liquid
Carefully add the rubbed ribs to the Dutch oven, bone-side down. Pour in the 0.25 cup honey and stir to distribute evenly. The honey will caramelize during cooking, adding depth of flavor and helping to tenderize the meat. Bring the liquid back to a gentle boil, then immediately reduce heat to medium-low to maintain a simmer.
Cover the Dutch oven with a tight-fitting lid and braise for 2 hours. The ribs should be submerged in the liquid, which should remain at a steady simmer. If the liquid reduces too much, add hot water as needed to keep the ribs covered. After 2 hours, check for tenderness by inserting a fork into the meat near the bone—it should slide in easily with minimal resistance.
If the ribs aren't tender enough, continue braising for another 30 minutes. The key is patience—the longer they cook in this moist environment, the more the connective tissue breaks down. The liquid should now have a rich, caramelized color with visible fond on the bottom of the pot.
Bake for Final Tenderness and Caramelization
Preheat your oven to 325°F. Transfer the ribs and their braising liquid to a baking dish large enough to hold everything without overflowing. Cover tightly with aluminum foil and bake for 1 hour. This step ensures the ribs reach their maximum tenderness while allowing the flavors to meld completely.
After 1 hour, remove the foil and increase the oven temperature to 425°F. Bake uncovered for an additional 15-20 minutes until the ribs develop a deep caramelized crust. The liquid should reduce significantly, creating a glossy glaze. The ribs should be fork-tender with a rich mahogany color. If the liquid reduces too quickly, you can add a splash of water to prevent burning.
During this final stage, the baking powder in the rub continues to work its magic, helping to break down any remaining connective tissue. The high heat also promotes Maillard reactions, creating that irresistible caramelized crust that's essential for fall-off-the-bone texture.
Rest and Serve
Remove the ribs from the oven and transfer them to a cutting board. Let them rest for 10-15 minutes before serving. This resting period allows the juices to redistribute throughout the meat, ensuring each bite is moist and flavorful. During this time, you can skim any excess fat from the braising liquid and reduce it further on the stovetop if you'd like to create a sauce.
Slice the ribs between each bone, keeping them attached at the bone ends for easy serving. The meat should pull apart effortlessly with minimal pressure, revealing tender, juicy meat with a beautiful caramelized exterior. Serve immediately with the reduced braising liquid spooned over the top, accompanied by crusty bread to soak up every last bit of flavor.
Pro Tips For Making Boil And Bake Ribs
- Trim the Fat First: Baby back ribs come with a thick fat cap that can make your braising liquid greasy and unevenly cooked. Use a sharp knife to trim it down to about ¼-inch—it’ll render better, keep the broth clearer, and help the ribs cook more evenly. (Yes, it’s extra work, but your sauce will thank you.)
- Don’t Crowd the Pot: I learned this the hard way—packing ribs too tightly in the boiling phase means the center stays tough and the outer edges overcook before the broth flavors them. Leave at least an inch of space between racks, and if you’re short on room, do two batches. Patience here saves you from rubbery ribs.
- Roast the Veggies First: Instead of chopping onions, carrots, and celery into tiny pieces that turn to mush, rough-chop them (½-inch dice) and roast them in the oven at 400°F for 15 minutes before adding to the pot. They’ll caramelize slightly, deepening the flavor of your braising liquid—no extra effort, just better taste.
- Check Internal Temp Twice: The ribs might look done after baking, but baby backs can fool you. Use a meat thermometer to confirm they hit 195°F at their thickest point—probe between bones, not the bone itself. If they’re still under, tent them with foil and bake another 15 minutes. Overcooked ribs are dry; undercooked ribs are a crime.
Storing and reheating this dish
Refrigerator Storage
Store your leftover ribs in an airtight container with their own juices to maintain moisture. I recommend using glass Pyrex containers with snap-on lids—they preserve flavors better than plastic. Keep them refrigerated at 40°F or below for up to 4 days.
The ribs will stay tender but may lose some crispness over time. To revive texture, reheat as directed below. 💫
Freezer Storage
For longer storage, freeze ribs in single-serving portions wrapped tightly in plastic wrap, then placed in a freezer bag with all air squeezed out. This method prevents freezer burn and maintains texture for up to 3 months.
When ready to eat, thaw overnight in the refrigerator before reheating. Never refreeze thawed ribs—they'll become dry and lose quality.
Reheating for Best Results
My preferred method is oven reheating: place ribs on a baking sheet, cover loosely with aluminum foil, and heat at 350°F for 15-20 minutes. Remove foil for the final 5 minutes to restore crispness.
For microwave reheating, cover ribs with a damp paper towel and heat on 50% power in 2-minute intervals until reaching 165°F internal temperature. Always check doneness with a meat thermometer.
Reviving Texture
If reheated ribs feel dry, brush them lightly with apple cider vinegar or beef broth before reheating. The acidity helps tenderize while adding moisture. For extra flavor, add a dash of smoked paprika or brown sugar to the reheating liquid.
This technique works especially well for ribs stored longer than 2 days in the fridge. 🔥
Sauce Preservation
Save any leftover braising liquid by storing it in a separate airtight container in the fridge for up to 5 days. For longer storage, freeze the sauce in ice cube trays—thaw and reduce on the stovetop when needed.
To use, simmer the frozen cubes with 1 tbsp honey and 1 tsp Worcestershire sauce for a quick rib dipping sauce. The sauce reheats beautifully and adds depth to any meal.
Meal Prep Tips
Prepare ribs ahead for game day or family gatherings by completing the boil phase up to 2 days in advance. Store the braised ribs in the fridge, then finish with the bake phase when ready to serve.
This saves time while ensuring maximum tenderness. For portion control, slice ribs into individual serving pieces before storing—this makes serving easier and prevents overcooking when reheating. ✨
Nutrition facts
Frequently asked questions
Why do I need to remove the membrane from the ribs?
The membrane is a tough, silvery layer that prevents flavor absorption and even cooking. Removing it ensures the ribs absorb the braising liquid and seasonings more effectively, resulting in more tender, flavorful meat. This simple step makes a noticeable difference in the final texture.
Can I use beef ribs instead of pork baby back ribs?
Yes, but the cooking time and tenderness will differ. Beef ribs have more connective tissue and require an additional 30-60 minutes of braising time. The baking phase remains similar, but monitor closely to avoid overcooking. For best results, use beef short ribs or beef back ribs.
What if my ribs aren't tender enough after 2 hours of boiling?
Don't rush! Continue braising for another 30-60 minutes until a fork slides in easily. If they're still tough, increase the oven temperature to 350°F for the final bake phase and extend the time by 15 minutes. Patience is key—this method is about breaking down collagen, not speed.
How can I make the ribs extra crispy without drying them out?
After the final bake at 425°F, broil the ribs for 2-3 minutes on high heat, watching closely to prevent burning. For extra crispiness, brush them with a thin layer of honey or apple cider vinegar before the high-heat finish. This creates a glossy, caramelized crust while keeping the meat juicy.
Can I skip the baking powder in the dry rub?
You can, but it may slightly reduce tenderness. The baking powder acts as a natural tenderizer by raising the pH slightly, helping break down collagen. If omitting, extend the braising time by 15-20 minutes to compensate. The flavor impact is minimal, but texture could be slightly firmer.