Side Dishes
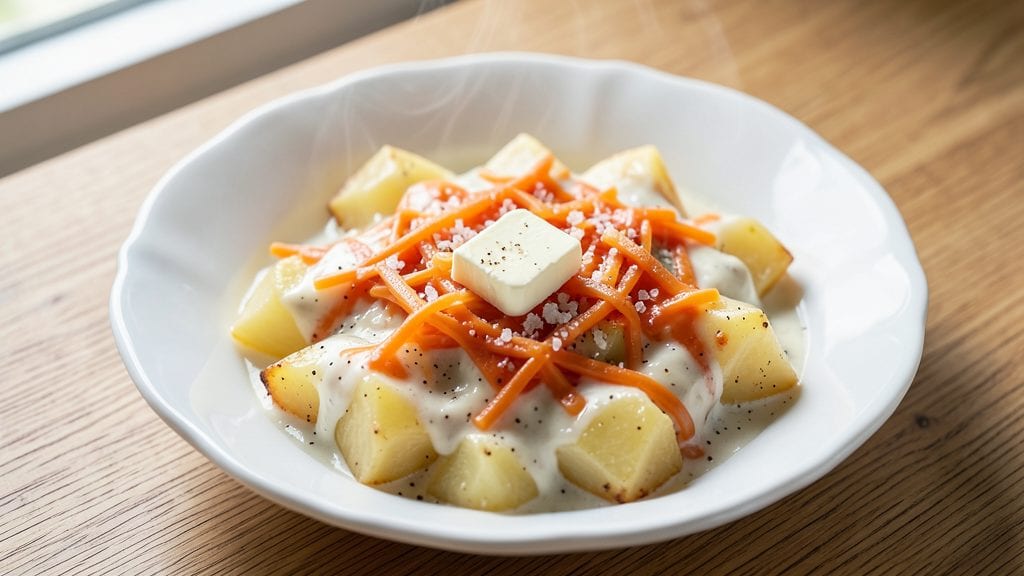
Transforming canned diced potatoes into crispy-topped scalloped potatoes proves that convenience and flavor aren’t mutually exclusive. This method delivers restaurant-quality results in just 20 minutes, using pantry staples and a simple baking technique that creates golden, crispy edges while keeping the interior creamy.
I developed this recipe during a particularly busy week when I needed a side dish that required minimal effort but maximum impact.
The secret to achieving that perfect crispy texture lies in proper layering and baking at the right temperature. You’ll start with a creamy cheese sauce base, then layer the potatoes and sauce in a baking dish before topping with a final layer of cheese and breadcrumbs.
Baking at 425°F ensures the top becomes beautifully golden and crispy while the potatoes underneath stay tender and flavorful.
By the time you pull this dish from the oven, you’ll have a side that’s crispy on top, creamy inside, and packed with cheesy goodness—ideal for serving alongside grilled meats, roasted vegetables, or even as a standalone dish.
The crispy breadcrumb topping adds a satisfying crunch that elevates the entire dish, making it feel like a special occasion meal without the fuss.
This recipe is incredibly versatile—use it as a side for holidays, game days, or weeknight dinners. The method scales easily, so you can adjust the portion size to fit your needs. Let’s get started on this foolproof, crispy-topped scalloped potatoes recipe that will impress everyone at the table.
Ingredients for canned diced potatoes
Pantry staples that turn into golden, crispy scalloped potatoes in under 20 minutes.
| Ingredient | Amount | Notes |
|---|---|---|
| Canned Diced Potatoes 🥔 | 2 cups | Drained, no added salt |
| Heavy Cream 🥛 | ½ cup | Full-fat for creaminess |
| Milk 🥛 | ½ cup | Whole milk preferred |
| Shredded Cheddar Cheese 🧀 | 1 ½ cups | Freshly shredded preferred |
| Butter 🧈 | 3 tbsp | Unsalted, melted |
| All-Purpose Flour 🌾 | 2 tbsp | For thickening sauce |
| Salt 🧂 | ½ tsp | Adjust to taste |
| Black Pepper 🌶️ | ¼ tsp | Freshly ground preferred |
| Garlic Powder 🧄 | ½ tsp | For added flavor |
| Panko Breadcrumbs 🍞 | ¼ cup | For crispy topping |
| Parmesan Cheese 🧀 | ¼ cup | Freshly grated preferred |
| Olive Oil 🫒 | 1 tbsp | For greasing dish |
The canned diced potatoes are the star here—look for brands like Libby's or Del Monte with no added salt. The heavy cream and milk combo makes the sauce rich without being too heavy. I always grab full-fat cream from the store (the good stuff, not the light kind)—it makes a noticeable difference. For the cheese, sharp cheddar gives the best flavor, but whatever you've got works. Freshly shredded cheese melts better than pre-shredded, but if that's all you've got, go for it. The butter should be unsalted so you control the seasoning.
No heavy cream? Half-and-half or whole milk with 1 tbsp butter works in a pinch. Short on panko? Regular breadcrumbs toasted with a bit of olive oil do the trick. Want extra crispiness? Add 1 tbsp cornstarch to the breadcrumbs before topping. The garlic powder is non-negotiable for flavor—it's what makes this taste homemade. If you're feeling fancy, add a pinch of nutmeg to the sauce. Trust me, it's worth it. The flour is just for thickening, so don't skip it unless you want a runny sauce.
This dish reheats beautifully—just cover with foil and pop in the oven at 350°F for 10 minutes. Keeps for 3-4 days in the fridge, but honestly, it disappears faster than that. For make-ahead meals, assemble the dish (without baking) and refrigerate for up to 24 hours. The crispy topping stays best when eaten fresh, so I always make extra. Freezes for 2 months if you're prepping for a crowd.
Why You'll Love This Recipe
- No Pantry Panic: I keep a can of these in my cabinet just for nights when I’m too tired to peel or chop—open, drain, and dump. That’s it. No stress, no mess, and honestly? The texture still holds up better than I expected.
- Creamy Cheese Hug: The heavy cream and cheddar melt into this dish like a warm blanket—rich but not heavy, with that little crispy bit on top when you broil it. My kids call it "potato pudding," but I won’t correct them.
- Leftovers That Don’t Suck: This keeps perfectly in the fridge for days, reheats like it’s fresh, and even tastes better the next day. Between us, I’ve taken it to potlucks twice this month, and no one’s asked what’s in it.
- Budget Booster: A single can of potatoes, a little milk, and a block of cheese stretch to feed four for under $8. That’s a meal where I don’t have to choose between groceries and my coffee habit—win.
Step-by-step instructions for crispy-topped scalloped potatoes
Here's how to make this creamy, crispy potato dish faster than you'd think—no peeling or boiling required.
Make the Creamy Potato Mixture
In a medium bowl, combine the 2 cups canned diced potatoes (make sure they're drained well—no extra liquid), 0.5 cup heavy cream, 0.5 cup milk, 1.5 cups shredded cheddar cheese, 0.5 tsp salt, 0.25 tsp black pepper, and 0.5 tsp garlic powder. Stir until the cheese is fully melted and the mixture is smooth. I like to use a rubber spatula for this—it helps scrape up any cheese clinging to the bowl.
This step is all about getting everything evenly mixed so each bite has that perfect blend of creamy potatoes and sharp cheddar. If the mixture looks too thick, stir in 1-2 tablespoons of milk to loosen it up. The texture should be like thick pudding but still pourable. Taste and adjust seasoning if needed—this is your only chance to fix any flavor issues before baking.
Prepare the Crispy Topping
In a separate bowl, mix together 0.25 cup panko breadcrumbs, 0.25 cup parmesan cheese, 2 tbsp all-purpose flour, and 0.25 tsp black pepper. This topping is what gives your dish that irresistible crispy crust. I like to use my fingers to work the mixture—it helps distribute the flour evenly through the breadcrumbs for maximum crunch.
Once combined, set the topping mixture aside. We'll add it right before baking so it stays crispy rather than getting soggy. If you're worried about the topping being too dry, you can lightly toast the panko in a dry skillet for 1-2 minutes over medium heat before mixing with the other ingredients—this adds extra crunch.
Assemble and Bake for Crispy Perfection
Preheat your oven to 375°F. Lightly grease a 9x9-inch baking dish with 1 tbsp olive oil—this prevents sticking and helps create that golden crust. Spread the potato mixture evenly into the prepared dish, using the back of a spoon to smooth the top. The layer should be about 1 inch thick—this ensures even cooking and a nice crispy top.
Sprinkle the panko mixture evenly over the top, pressing down very gently with your fingers. This helps the topping stick to the potatoes and creates those beautiful golden-brown patches. Bake for 18-20 minutes until the top is deep golden brown and the edges are bubbling. The center should still be slightly jiggly—it'll firm up as it cools.
Rest and Serve Warm
Remove the dish from the oven and let it rest for 5 minutes before serving. This resting time allows the top to set slightly and makes it easier to slice. The potatoes will look creamy and the top will be beautifully crispy—exactly what we wanted. If you're serving immediately, run a knife around the edges to help loosen the potatoes from the dish.
Slice into squares and serve warm. The contrast between the creamy potato center and crispy breadcrumb top is what makes this dish so special. These potatoes are perfect with a simple green salad or steamed vegetables, and they reheat beautifully if you have leftovers. The crispy topping might soften slightly when reheated, so enjoy them fresh when possible.
Pro Tips For Making Canned Diced Potatoes
- Drain and Rinse First: I learned this the hard way—skipping this step leaves your dish watery and bland. Open the can, drain the potatoes, then rinse them under cold water to wash away excess starch. Trust me, your sauce will thank you.
- Simmer, Don’t Boil: This isn’t the prettiest method, but it’s the tastiest. Once you’ve mixed in the cream, milk, and cheese, keep the heat at a gentle simmer (not a rolling boil) for 5-7 minutes. Boiling turns the cream grainy, and nobody wants that.
- Use Sharp Cheese: The shredded cheddar you grab off the shelf might look fine, but it’s often pre-shredded with anti-caking agents that make it melt poorly. If you can, grab a block of cheddar and shred it yourself—it melts smoother and tastes richer. (Yes, even if you’re impatient like me.)
- Butter the Potatoes: Don’t just melt the butter in the pan—toss the drained, rinsed potatoes in it first. Coat them evenly before adding liquids. This adds a subtle richness and prevents the sauce from turning into a sad, thin glaze. It’s a small step, but it makes a real difference.
Pro cooking tips for great canned diced potatoes
Cheese Melting Secrets
For perfectly melted cheese, I always start by shredding my own cheddar using a box grater—pre-shredded cheese contains anti-caking agents that prevent smooth melting. Microwave the cheese in 20-second bursts while stirring between each interval to break up any clumps.
This ensures a silky texture in your potato mixture. 🧀
If your cheese separates or looks grainy after mixing, strain the mixture through a fine-mesh sieve to remove any excess moisture. This step is especially important when using lower-fat cheeses, as they tend to release more liquid when heated.
I’ve found that sharp cheddar melts best for this recipe, but a blend of cheddar and Monterey Jack adds extra creaminess.
Crispy Topping Hacks
The key to an ultra-crispy topping is using panko breadcrumbs instead of regular breadcrumbs—their larger flakes create more surface area for browning.
For extra crunch, I like to toast the panko in a dry skillet over medium heat for 2-3 minutes until lightly golden before mixing with the other topping ingredients. This step adds an extra layer of texture that you won’t get otherwise.
Press the topping mixture gently but firmly onto the potatoes before baking—this ensures it sticks and creates those coveted crispy patches. If you’re worried about the topping getting soggy, sprinkle an additional ¼ teaspoon of cornstarch into the panko mixture.
Bake at 425°F for the last 3-5 minutes of cooking to maximize browning and crispiness.
Temperature Control
Your oven’s temperature accuracy is critical for this recipe. I recommend using an oven thermometer to verify that your oven is actually at 375°F—many ovens run hot or cold. If your dish isn’t browning enough, increase the temperature to 400°F for the last 5 minutes of baking.
For even cooking, place a small baking sheet on the lower oven rack to reflect heat upward.
Never open the oven door during the last 10 minutes of baking—this causes temperature fluctuations that can lead to a soggy top. If you need to check on your dish, use the oven light instead.
The potatoes are done when the top is deep golden brown and the edges are bubbling, but the center is still slightly soft—it will firm up as it cools.
Potato Drainage
Properly draining canned potatoes is non-negotiable for creamy results. After opening the can, transfer the potatoes to a fine-mesh strainer and rinse them under cold water to remove excess starch. Use a spoon to press out any remaining liquid—this prevents a watery potato mixture.
I also like to pat the drained potatoes dry with a clean kitchen towel to absorb any lingering moisture.
If your canned potatoes still seem too wet after draining, spread them on a baking sheet lined with parchment paper and bake at 350°F for 5 minutes to evaporate excess moisture. This step is especially helpful if you’re using a brand of canned potatoes that tends to be very watery.
The goal is a mixture that’s thick enough to hold its shape but still pourable.
Nutrition facts
Frequently asked questions
Can I use frozen diced potatoes instead of canned?
While canned potatoes work best for this recipe, you can use frozen diced potatoes with a few adjustments. Thaw them completely first, then drain and pat dry thoroughly to remove excess moisture. You may need to bake for an extra 2-3 minutes to achieve the same crispy texture. The flavor won't be identical, but it's a good backup option when canned potatoes aren't available.
Why did my topping get soggy instead of crispy?
Soggy toppings usually happen when moisture escapes from the potatoes during baking. To fix this, ensure you've drained and dried the potatoes completely before assembling. Press the topping firmly into the potatoes and bake at 425°F for the last 3-5 minutes to maximize crispiness. Adding 1/4 tsp cornstarch to the breadcrumb mix also helps absorb moisture.
What are some great ways to serve these potatoes?
These crispy-topped potatoes pair perfectly with grilled meats like chicken or steak, or as a hearty standalone dish. Try serving with a simple green salad or roasted vegetables for a complete meal. They're also great for game day gatherings or holiday dinners. The creamy texture makes them ideal for pairing with tangy sauces like sour cream or hot sauce.
Can I make this ahead of time?
Assemble the dish completely (without baking) and refrigerate for up to 24 hours before baking. For best results, bake from cold at 375°F for 25-30 minutes instead of the original 18-20 minutes. The crispy topping stays best when eaten fresh, but the creamy potato mixture reheats beautifully. This makes it perfect for meal prep.
How do I adjust this recipe for a larger crowd?
Double the recipe and use a 9x13-inch baking dish instead of 9x9-inch. Increase baking time by 5-7 minutes to ensure even cooking. For extra crispiness on larger batches, divide the mixture between two baking dishes. The same ratio of ingredients works perfectly—just scale everything up proportionally. This makes it ideal for family gatherings or potlucks.