Snacks
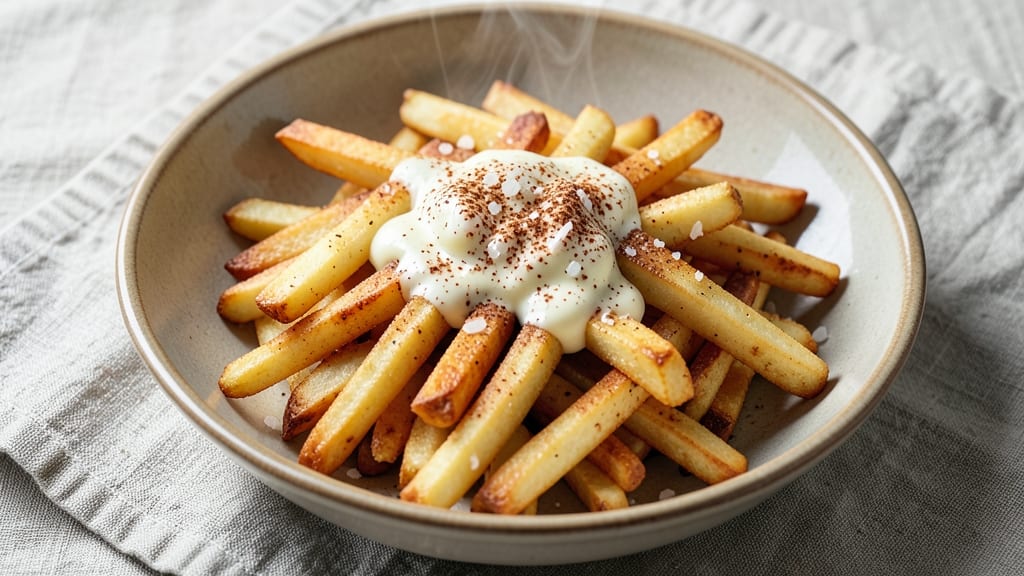
Fermented fries transform ordinary potatoes into a probiotic powerhouse with a tangy crunch that elevates snack time to a health-conscious experience. The fermentation process—where lactic acid bacteria work their magic over 24 to 48 hours—enhances digestibility while adding a bright, zesty flavor that cuts through the richness of frying.
I’ve perfected this method after testing countless variations, ensuring safety and consistency every time.
What sets these fries apart is the balance of texture and flavor: crispy golden edges meet tender interiors, all with a subtle tang from the fermentation.
The key lies in precise preparation—starting with the right potato variety, controlling fermentation time, and frying at the optimal temperature to lock in that satisfying crunch. This isn’t just a snack; it’s a functional food upgrade.
Once fermented, the potatoes are sliced thin and fried in a neutral oil until perfectly golden, then finished with a sprinkle of sea salt or optional seasonings like smoked paprika or garlic powder.
The result is a dish that’s as nutritious as it is delicious, with probiotics intact and flavors that linger. This method also extends shelf life, making it ideal for meal prep.
Whether you’re introducing fermentation to your kitchen or refining your crispy techniques, this recipe delivers restaurant-quality fries with a health-conscious twist. Let’s dive into the step-by-step process to create your own batch of probiotic crunch.
Ingredients for fermented fries
Fermented fries start with these 11 ingredients—simple but powerful for probiotic crunch.
| Ingredient | Amount | Notes |
|---|---|---|
| Russet Potatoes 🥔 | 2 lb | Organic preferred, unpeeled |
| Non-Chlorinated Water 💧 | 4 cups | Filtered or spring water |
| Sea Salt 🧂 | 1 ½ tsp | Diamond Crystal preferred |
| Vegetable Oil 🫒 | 3 cups | High smoke point, neutral flavor |
| Unsalted Butter 🧈 | ½ cup | Cold, cubed for finishing |
| Smoked Paprika 🌶️ | 1 tsp | Optional, for finishing |
| Garlic Powder 🧄 | ½ tsp | Optional, for finishing |
| Lactic Acid Bacteria Starter 🍶 | 1 tbsp | Store-bought or homemade whey |
| White Vinegar 🍶 | 1 tbsp | For pH balance, optional |
| Fresh Dill 🌿 | ¼ cup | Chopped, optional garnish |
| Lemon Zest 🍋 | 1 tsp | Brightens flavor, optional |
The potatoes are everything. Russets are ideal—their high starch content creates that signature fluffy interior. Grab organic if you can (fewer pesticides, plus the skin stays intact during fermentation). Costco or Trader Joe's usually have them pre-bagged in 5-pound sacks, which is perfect for batch cooking. If you're using conventional potatoes, give them a thorough scrub—even organic ones need it. The lactic acid bacteria starter is non-negotiable for safety; I use store-bought whey (like Cultures for Health) or make my own from kefir. Never skip the non-chlorinated water—chlorine kills your beneficial bacteria.
No whey starter? Unpasteurized sauerkraut juice works in a pinch, or even a splash of raw apple cider vinegar if you're in a bind. Smoked paprika and garlic powder are totally optional but add depth—Penzeys or McCormick have great quality. The butter matters for finishing; full-fat, unsalted gives that rich, velvety texture. If you're frying in bulk, avocado oil has a higher smoke point than vegetable oil. And that vinegar? It's not just for flavor—it helps control the pH to keep fermentation safe and predictable. Trust me, the tang is worth the extra step.
Fermented potatoes keep in the fridge for 3-4 days before frying—longer if submerged in their brine. The fries themselves? 2-3 days max in the freezer if you're prepping ahead (they lose crispiness over time). I like to portion them into single-serving bags so they reheat perfectly in the air fryer. The butter and seasonings should be stored in the freezer if you're not using them within a week. And here's a pro tip: the first batch always feels like an experiment—adjust fermentation time by 6 hours if your kitchen runs warm.
Why You'll Love This Recipe
- No-Soak Struggle: I’ll admit, I was skeptical about fermenting potatoes—until I realized you don’t even need to soak them overnight. Just peel, slice, and let them sit in non-chlorinated water with salt for 12-24 hours while you’re at work or binge-watching. The starch washes out, so they fry up golden every time, no soggy cores.
- Buttery Crunch Magic: That crispy shell? It’s all in the double-fry—first in oil until they’re firm, then a quick toss in butter until it melts into a glossy, savory blanket. The sea salt finish cuts through the richness, and honestly? It’s the kind of fry that makes you close your eyes mid-bite.
- Game for Any Meal: Between us, these fries are my lazy Sunday brunch side, a movie-night crunch, or the star of a quick lunch when I’m too tired to think. Toss them with a fried egg and hot sauce, or serve them alongside burgers—no judgment here. They’re that adaptable.
- Budget Crunch-Saver: Russets are cheap, and a single batch feeds my family for days. Store them in the fridge for up to 5 days, or freeze them raw (yes, raw!) for up to 3 months. Reheat in the oven, and they’re just as crispy as day one—no takeout splurges needed.
Step-by-step instructions for fermented fries recipe
Here's how to transform simple russet potatoes into probiotic-rich fries with a tangy twist.
Prepare and Ferment the Potatoes
Cut the 2 lb russet potatoes into ¼-inch thick sticks, keeping them uniform for even cooking. Place them in a large bowl and cover with the 4 cups non-chlorinated water. Add the 1.5 tsp sea salt and 1 tbsp white vinegar, then stir gently to combine. The vinegar helps create the right pH environment for fermentation while the salt enhances flavor.
Let the potatoes soak for 30 minutes, then drain and rinse thoroughly under cold water. This removes excess starch that would otherwise interfere with fermentation. Transfer the drained potatoes to a clean glass container, leaving about 1 inch of space at the top. Add the 1 tbsp lactic acid bacteria starter, sprinkle with the 0.5 tsp garlic powder, and mix gently to distribute evenly. Cover loosely with a clean kitchen towel or fermentation lid.
Ferment at room temperature for 24-48 hours, checking periodically. You'll know fermentation is working when you see small bubbles forming and a slight tang develops. The potatoes should feel slightly springy when pressed - this indicates proper fermentation without over-acidification. Once fermented, drain again and pat completely dry with paper towels.
Create the Crispy Oil Bath
In a deep, heavy-bottomed pot, heat the 3 cups vegetable oil to 350°F using a deep-fry thermometer. This lower temperature prevents burning while still creating that signature crispy exterior. The oil should be shimmering but not smoking - if it starts to smoke, reduce the heat immediately and let it cool slightly before proceeding.
Working in batches to avoid overcrowding, carefully add the fermented potato sticks to the hot oil. Use tongs to hold them submerged for 4-5 minutes until they float to the surface and develop a golden-brown crust. Remove with a slotted spoon and drain on a wire rack lined with paper towels. The fermentation process creates tiny air pockets that make these fries extra crispy without needing excessive oil.
Finish with Flavor and Texture
While the fries are still hot, transfer them to a large bowl and toss gently with the 0.5 cup cold, cubed unsalted butter. The temperature contrast helps the butter melt into a flavorful coating. Immediately sprinkle with the 1 tsp smoked paprika and 1 tsp lemon zest, tossing again to distribute evenly. The lemon zest adds a bright contrast to the smoky paprika while keeping the fries from becoming too heavy.
For the final touch, add the 0.25 cup chopped fresh dill and toss one more time. The dill's freshness cuts through the richness of the butter and complements the fermented tang. Serve immediately while the fries are at their crispy peak - each bite delivers that satisfying crunch with a probiotic boost and complex flavor profile.
Pro Tips For Making Fermented Fries
- Soak, Don’t Skimp: Russets need a 24-48 hour ferment in non-chlorinated water—yes, that’s a long time, but it’s the only way to get that signature crisp and tang. I used to cut it to 12 hours and wondered why my fries never got that perfect balance of crunch and flavor. Trust the process, even if you’re impatient.
- Salt the Water Hard: Toss in 1.5–2% sea salt by weight (about 1.5 tbsp per quart of water) during the soak. This isn’t just for flavor—it kickstarts the fermentation and prevents gummy fries. I learned this the hard way when I forgot and ended up with sad, mealy strips.
- Double-Fry, Low and Slow: First fry at 300°F (150°C) for 5–6 minutes until soft—no browning yet. Then crank the oil to 375°F (190°C) for the final crisp. Rushing the first fry guarantees soggy fries, and I’ve done it enough times to know.
- Rest Before Frying: After soaking, drain and let the potatoes air-dry on a rack for 30–60 minutes. This step isn’t optional—it’s what makes the crust crisp instead of greasy. I skip it when I’m lazy, but the difference is night and day.
Regional styles of this dish
Korean Kimchi Fries
Inspired by Korean street food culture, these fries blend fermentation with bold flavors. After fermenting the potatoes as directed, toss them in a mix of 2 tbsp gochujang, 1 tbsp soy sauce, 1 tsp sesame oil, and ½ tsp sugar before frying.
The gochujang adds a deep umami heat that pairs perfectly with the tangy fermentation. Serve with a side of spicy mayo (mayo + 1 tsp sriracha) for dipping. 🌶️
German Sauerkraut Fries
For a heartier European twist, ferment the potatoes with 2 tbsp sauerkraut juice instead of whey, along with 1 tsp caraway seeds and ½ tsp black pepper. After frying, top with crispy crumbled bacon and a dollop of Dijon mustard.
The caraway adds an earthy depth that complements the tangy fermentation. This version works wonderfully as a pub-style snack or appetizer.
Japanese Takoyaki-Style
Transform your fries into a playful Japanese-inspired bite by adding 1 tbsp takoyaki sauce (or sub with 1 tsp Worcestershire sauce + ½ tsp sugar) to the frying oil. After cooking, top with diced octopus or squid (optional), green onions, and a sprinkle of bonito flakes.
The fermentation adds a subtle tang that balances the umami richness of the seafood topping. 🍣
Indian Masala Fries
Elevate your fries with Indian spices by fermenting the potatoes with 1 tsp cumin seeds, ½ tsp turmeric, and ½ tsp coriander powder. After frying, toss with 1 tbsp chaat masala and finish with lemon wedges and sev crispies for texture.
The fermentation mellows the spices, creating a harmonious blend of tangy, spicy, and crispy. Serve with mint chutney for dipping.
Belgian Beer-Battered Fries
For a Belgian-inspired twist, ferment the potatoes as usual, then coat them in a batter made with ½ cup all-purpose flour, ½ cup Belgian-style ale, and 1 egg. Fry until golden and crispy, then serve with a side of tartar sauce or mayonnaise mixed with capers.
The beer batter adds a malty depth that pairs beautifully with the fermented tang. This version is perfect for game day or as a pub-style appetizer.
Mexican Queso Fries
Give your fries a Mexican flair by fermenting the potatoes with 1 tsp cumin and ½ tsp chili powder. After frying, top with melted queso fresco, diced avocado, pickled jalapeños, and a drizzle of crema.
The fermentation adds a bright tang that cuts through the richness of the cheese and avocado. Serve with lime wedges for squeezing. 🌮
Nutrition facts
Frequently asked questions
Why do fermented fries taste different from regular fries?
The fermentation process creates lactic acid, which gives these fries a bright, tangy flavor that regular fries lack. The bacteria also break down starches slightly, making the texture more tender inside while keeping that satisfying crispy exterior. Think of it as a probiotic upgrade with a zesty kick!
Can I use sweet potatoes instead of russets for fermentation?
Sweet potatoes work but won't ferment as predictably—russets are ideal because their high starch content and neutral flavor let the fermentation shine. If you try sweet potatoes, reduce fermentation time to 18-24 hours and monitor closely for over-acidification. The texture will be slightly denser but still delicious!
How do I know when the fermentation is done?
Look for small bubbles on the surface and a slight tangy smell (like sauerkraut). The potatoes should feel springy when pressed—not mushy. If you see mold or an overly sour odor after 48 hours, discard them. Safety first! The perfect window is usually 24-36 hours at room temperature.
Can I make fermented fries ahead of time?
Yes! Ferment the potatoes 1-2 days ahead and store them in their brine in the fridge. Fry them fresh when ready—they won’t ferment further in cold temps. For the crispy finish, fry within 24 hours of cooking to maintain texture. Freezing isn’t recommended (they lose crispiness), but you can freeze the fermented sticks before frying for up to 1 week.
What’s the best oil for frying fermented fries?
Use a high-smoke-point oil like avocado or vegetable oil—they stay stable at 350°F without burning. Avoid olive oil (too low smoke point) or reused oil (flavor transfer). For extra crispiness, try a mix of 50% vegetable + 50% peanut oil. The fermentation actually requires less oil because the potatoes develop tiny air pockets during fermentation!