Main Courses
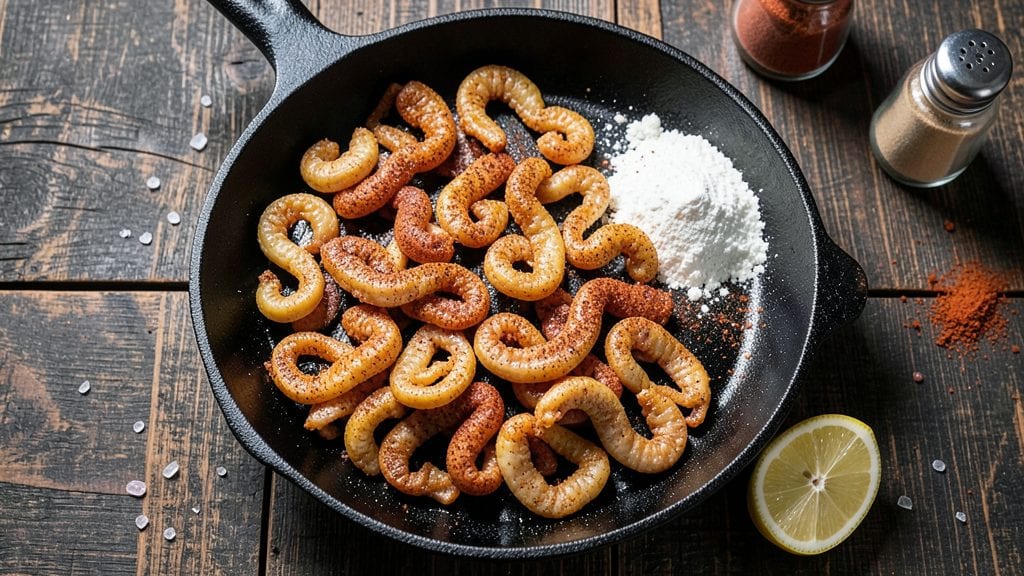
This fried chitterlings recipe delivers smoky-spiced crispy bites that capture the soul of Southern cooking—where tradition meets crispy perfection in just 30 minutes. The secret lies in proper cleaning and a well-balanced seasoning blend that enhances the natural pork flavor without overpowering it.
I’ve perfected this method after countless batches, ensuring every bite achieves that ideal crunch while staying tender inside.
The process begins with thorough cleaning and soaking, a critical step that removes impurities and prepares the chitterlings for frying. Once seasoned with a mix of smoked paprika, garlic powder, and cayenne, they develop a deep, aromatic crust that’s impossible to resist.
The high-heat frying technique is what transforms these humble ingredients into a dish that’s both nostalgic and irresistibly crispy.
What you’ll end up with is a plate of golden, shatteringly crispy chitterlings that pair beautifully with cornbread, collard greens, or a tangy vinegar-based dip.
The smoky aroma alone will have everyone gathered around the table, and the texture—crisp on the outside, tender on the inside—is what makes this recipe a standout. This is comfort food at its finest, rooted in tradition but elevated with technique.
Perfect for family gatherings, holiday feasts, or a hearty weeknight meal, these chitterlings bring a taste of Southern heritage to your kitchen. Whether you’re serving a crowd or treating yourself to a taste of nostalgia, this recipe delivers restaurant-quality results with minimal effort. Let’s get cooking!
Ingredients for fried chitterlings
The foundation of crispy, smoky chitterlings lies in these carefully selected ingredients—each playing a crucial role in texture and flavor.
| Ingredient | Amount | Notes |
|---|---|---|
| Fresh Pork Chitterlings 🥓 | 1 ½ lb | Thoroughly cleaned and soaked overnight |
| All-Purpose Flour 🌾 | 1 ½ cups | For dredging, unsifted |
| Smoked Paprika 🌶️ | 2 tbsp | High-quality for authentic smokiness |
| Garlic Powder 🧄 | 1 ½ tbsp | Freshly ground preferred |
| Ground Cayenne Pepper 🔥 | 1 tsp | Adjust for heat preference |
| Salt 🧂 | 1 ½ tsp | Diamond Crystal kosher salt |
| Black Pepper 🌶️ | ½ tsp | Freshly cracked for best flavor |
| Vegetable Oil 🫒 | 4 cups | High smoke point, like peanut oil |
| Lemon Juice 🍋 | 1 tbsp | Brightens the final flavor |
| Fresh Parsley 🌿 | ¼ cup | Chopped, for garnish |
| Hot Sauce 🌶️ | 1 tbsp | Optional, for serving |
| Cornmeal 🌽 | ½ cup | For extra crunch (optional) |
The quality of your chitterlings is non-negotiable. Look for fresh, high-quality pork intestines from a trusted butcher or specialty meat supplier—Hog Heaven Meats or Snappy Snacks are reliable sources. Proper cleaning is essential: soak overnight in cold water with a tablespoon of vinegar and baking soda, then rinse thoroughly. The flour should be unsifted, all-purpose—it creates the perfect crispy crust. For smoked paprika, Penzeys or McCormick Gourmet offer superior quality that enhances the dish's authentic Southern profile. Cayenne should be ground, not powdered, to ensure even distribution of heat.
No smoked paprika? Substitute a mix of sweet paprika and a pinch of liquid smoke, though the flavor won't be identical. Garlic powder can be replaced with minced fresh garlic at double the amount, but it burns faster during frying. For those avoiding gluten, cornstarch or crushed cornflakes work well as flour substitutes. Vegetable oil is ideal, but peanut or avocado oil also handle high heat beautifully. If you can't find Diamond Crystal salt, Morton kosher salt is a close alternative—just measure carefully as grain size varies. The lemon juice and parsley are finishing touches that brighten the dish without overpowering the smoky notes.
Store cleaned, uncooked chitterlings in an airtight container in the fridge for up to 2 days, submerged in cold water. Once fried, they’re best served immediately, but leftovers keep for 3 days in the fridge. For longer storage, freeze fried chitterlings on a tray first to prevent sticking, then transfer to a sealed bag for up to 3 months. Reheat in a 350°F oven for 10 minutes to restore crispiness. Garnish with parsley and hot sauce just before serving to maintain freshness and vibrancy.
Why You'll Love This Recipe
- No-Fuss Prep: I swear by this recipe because it’s the kind of meal that lets you skip the prep battle. Soak the chitterlings overnight (or even just a few hours if you’re pinched for time), then toss them in flour with smoked paprika and cayenne—no chopping, no fuss, just a quick dip and fry.
- Smoky Kick: That smoked paprika and cayenne? It’s the magic. The chitterlings get this perfect crunchy crust outside while staying tender inside, and the spices linger like a campfire in your mouth—savory, a little spicy, but never overpowering.
- Weeknight Hero: Between us, this is my go-to when I’ve got friends over or just need something hearty fast. Serve it with cornbread or collards, and suddenly you’ve got a full Southern spread without the stress of a multi-course menu.
- Budget Feast: Honestly, chitterlings stretch a meal like nothing else. A pound feeds four easily, and the ingredients cost a fraction of what you’d spend on steak or chicken. Plus, leftovers reheat like a dream—crispy again in the oven if you’re feeling fancy.
Step-by-step instructions for smoky-spiced crispy chitterlings
Here's how to transform tender chitterlings into perfectly crispy, golden bites with a deep smoky flavor.
Prepare the Chitterlings for Frying
Begin by thoroughly rinsing the 1.5 lb fresh pork chitterlings under cold running water to remove any remaining impurities. This step is crucial—chitterlings require extensive cleaning before cooking. After rinsing, place them in a large bowl and cover with cold water. Soak for at least 4 hours (or overnight in the refrigerator) to remove any remaining blood or gamey flavors. Drain and rinse again before proceeding.
Once drained, pat the chitterlings completely dry with paper towels. This drying step prevents the flour from absorbing moisture, which is essential for achieving that crispy exterior. Arrange them on a clean kitchen towel and let them air-dry for 10-15 minutes while you prepare your seasoning blend. The goal is to have them as dry as possible before frying—this ensures maximum crispiness when they hit the hot oil.
Create the Seasoning Blend and Dredge the Chitterlings
In a medium bowl, combine 1.5 cups all-purpose flour, 2 tbsp smoked paprika, 1.5 tbsp garlic powder, 1 tsp ground cayenne pepper, 1.5 tsp salt, and 0.5 tsp black pepper. Mix thoroughly with your hands or a whisk until the spices are evenly distributed throughout the flour. This blend will give your chitterlings that signature smoky-spiced crust.
Working in batches, dredge each chitterling in the seasoned flour mixture, pressing gently to ensure full coverage. For extra crunch, you can optionally mix in 0.5 cup cornmeal with the flour before dredging. Let the coated chitterlings rest for 5 minutes on a wire rack. This resting period allows the flour to adhere better and prevents clumping when you add them to the hot oil. Don't skip this step—it makes a noticeable difference in texture.
Heat the Oil and Fry to Golden Perfection
Pour 4 cups vegetable oil into a deep, heavy-bottomed skillet or Dutch oven. Heat the oil over medium-high heat until it reaches 350°F (use a deep-fry thermometer for accuracy). The oil should be hot enough to sizzle gently when you add the chitterlings, but not smoking excessively. If the oil smokes too much, reduce the heat slightly and allow it to stabilize.
Working in small batches (to avoid overcrowding), carefully add the coated chitterlings to the hot oil. Fry for 4-5 minutes per batch, turning occasionally with tongs, until they are golden brown and crispy on all sides. The key here is patience—undercooked chitterlings will be tough, while overcooked ones will lose their crispiness. You'll know they're done when they float to the surface and maintain their golden color when removed with tongs.
Drain and Finish with Bright Flavors
Transfer the fried chitterlings to a paper towel-lined plate to drain excess oil. Sprinkle immediately with 1 tbsp lemon juice while they're still hot. This brightens the smoky flavors and adds a subtle tang that cuts through the richness. The lemon juice also helps set the crispy texture by sealing the exterior slightly.
Garnish the chitterlings with 0.25 cup chopped fresh parsley and serve immediately with 1 tbsp hot sauce on the side if desired. These crispy bites are best enjoyed fresh out of the fryer while the coating is still crunchy. Serve with cornbread, collard greens, or your favorite sides for a complete Southern-style meal. The combination of smoky spices, crispy texture, and bright lemon finish makes these chitterlings irresistible.
Pro Tips For Making Fried Chitterlings
- Boil Until Fork-Tender: Chitterlings need a good long soak—20 minutes minimum—to purge that bitter off-flavor, then simmer in fresh water for at least 45 minutes until they’re so tender they fall apart when pierced. I learned this the hard way after serving a batch that tasted like chewy rubber. Use a big pot and don’t skimp on the water.
- Pat Dry Like Your Life Depends on It: After boiling, spread the chitterlings on a wire rack (not paper towels—this traps moisture) and let them air-dry for 10-15 minutes. Wet chitterlings won’t crisp up no matter how much flour you use. I skip this step sometimes, and the result is sad, greasy, and uncrispy.
- Double-Dredge for Crunch: Dip the drained chitterlings in flour once, shake off the excess, then dip them in another shallow bowl of flour before frying. The second coat locks in that smoky, spicy crust. Sounds like overkill, but it’s the thing that makes the difference between "meh" and "holy smokes."
- Fry in Batches or Risk a Grease Fire: Chitterlings release a ton of moisture, so crowding the pan will turn your oil into a bubbling mess. Fry no more than 6-8 at a time in 350°F oil—hot enough to sizzle but not smoke. I’ve seen people ignore this and end up with a grease splatter disaster. (Yes, even if you’re impatient like me.)
Essential equipment for perfect results
Deep Fryer Essentials
For perfect chitterlings, a deep fryer is my go-to tool because it maintains consistent 350°F oil temperature automatically. I recommend the Presto 02700 4-Quart Oil Less Deep Fryer—it’s durable, easy to clean, and handles 4 cups of oil perfectly for this recipe.
If you prefer stovetop frying, use a heavy-bottomed Dutch oven like Lodge 5.5-Quart to prevent hot spots that can burn your chitterlings unevenly. 🔥
Thermometer Accuracy
Never guess your oil temperature—accuracy is critical for crispy results. The ThermoWorks Thermapen One is my favorite because it reads 350°F instantly and has a backlit display for easy viewing. If you’re on a budget, the Taylor Precision Products Instant-Read Thermometer works well too.
Insert it into the oil while heating, and adjust the burner if temps fluctuate beyond ±5°F of your target. Overheated oil burns the coating, while underheated oil makes soggy chitterlings.
Dredging Tools
Use a wire mesh strainer (like the OXO Good Grips) to drain excess oil after frying—it prevents soggy piles of chitterlings.
For seasoning, I mix spices in a large glass bowl (like Pyrex 8-cup) because it’s easy to clean and lets me see the even distribution of smoked paprika and garlic powder.
A pair of tongs (I love OXO Good Grips) helps flip chitterlings without tearing the crispy coating. Keep them within reach while frying for quick, even cooking.
Oil Management
High-smoke-point oils like peanut or vegetable oil are non-negotiable—they withstand 350°F without breaking down. I strain used oil through a fine-mesh cheesecloth (like Annie’s Homegrown) to remove food particles before storing in a glass jar for future frying.
For extra crispiness, add 1 tablespoon apple cider vinegar to the oil before frying—it lowers the moisture content of the chitterlings, creating an even crunchier crust. 💡
Crispy Texture Hacks
Pat chitterlings extra dry with paper towels before dredging—moisture is the enemy of crispiness. I double-dredge them in flour for an extra-thick crust, especially if using cornmeal. For reheating leftovers, spread them on a wire rack in a 350°F oven for 5 minutes to restore crunch.
A silicon spatula (like OXO Good Grips) helps scrape every last crispy bite from the fryer without damaging the coating.
Nutrition facts
Frequently asked questions
Why do chitterlings need to soak overnight?
Soaking removes impurities and gamey flavors that make chitterlings tough or bitter when raw. The 4+ hour (or overnight) soak in cold water with vinegar breaks down membranes, while thorough rinsing afterward ensures clean, tender results. Skipping this step risks a mushy texture or unpleasant taste.
Can I use cornmeal instead of flour for extra crunch?
Mix ½ cup cornmeal with the flour for a thicker, crunchier coating. For best results, double-dredge the chitterlings in the cornmeal-flour blend. This works especially well if you prefer a Southern-style extra-crispy texture, but it requires slightly higher oil temps (360°F) to avoid burning.
What if my chitterlings turn out greasy instead of crispy?
Greasy chitterlings usually mean the oil wasn’t hot enough (350°F is critical) or the chitterlings weren’t dry enough before frying. For next time, pat them extra dry with paper towels and use a thermometer to verify oil temp. Fry in small batches to avoid crowding, which lowers oil temperature.
How do I store leftover fried chitterlings?
Store in an airtight container for up to 3 days in the fridge. To reheat, spread on a wire rack in a 350°F oven for 5-7 minutes to restore crispiness. For longer storage, freeze fried chitterlings on a tray first, then transfer to a sealed bag for up to 3 months. Avoid microwaving—they’ll turn soggy!
What’s the best way to serve fried chitterlings?
Pair with classic Southern sides like cornbread, collard greens, or mac and cheese. Serve with a tangy dip—mix 1 tbsp hot sauce with 2 tbsp mayo and a squeeze of lemon. For extra flair, garnish with chopped green onions or parsley right before serving.