
Main Courses
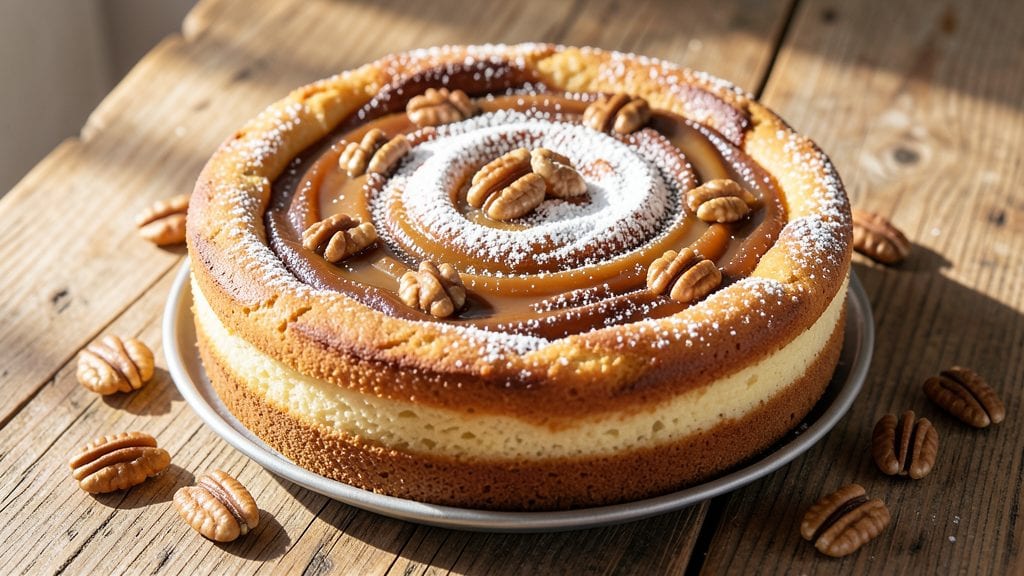
This authentic Polish nut roll recipe delivers the warm, spiced walnut swirl that defines traditional Polish baking—layer upon buttery layer, rolled tightly and baked to golden perfection. 🌟 The secret lies in balancing yeast dough with a rich nut filling, a technique passed down through generations that transforms simple ingredients into something extraordinary.
I've perfected this version after years of testing, ensuring every bite delivers that signature combination of crispy crust and tender, nutty filling.
The process begins with a classic yeast dough that's rolled out thin, spread with a fragrant walnut filling, and carefully swirled into that iconic spiral shape. Traditional Polish bakers often add a touch of cinnamon or cardamom to the filling, while some variations include raisins or citrus zest for brightness.
What makes this recipe truly authentic is the attention to detail—brushing each layer with egg wash before baking creates that signature golden-brown crust, while precise rolling ensures even layers that slice beautifully.
Once baked, you'll have a loaf with a crisp exterior and a soft, fluffy interior filled with chunks of walnuts and spiced sugar. The aroma alone—warm, nutty, with hints of vanilla and cinnamon—will fill your kitchen and transport you straight to a Polish bakery.
This is the kind of recipe that feels like a hug in bread form, perfect for holidays, family gatherings, or simply treating yourself to something special.
Ready to master this classic? We'll walk through every step—from preparing the dough to rolling, slicing, and baking—to ensure your nut roll turns out perfectly every time. The result is a showstopping dessert that's as impressive to look at as it is delicious to eat.
Ingredients for authentic polish nut roll
Four cups flour, a pinch of yeast, and walnuts that taste like home. Simple ingredients, extraordinary result.
| Ingredient | Amount | Notes |
|---|---|---|
| All-Purpose Flour 🌾 | 4 cups | Spooned and leveled measurement |
| Active Dry Yeast 🍞 | 2 ¼ tsp | Freshly opened for best results |
| Granulated Sugar 🍚 | ¼ cup | White sugar preferred |
| Unsalted Butter 🧈 | ½ cup | Cold, cubed for dough |
| Large Eggs 🥚 | 1 whole | Room temperature preferred |
| Warm Milk 🥛 | ¾ cup | 110°F for yeast activation |
| Salt 🧂 | ½ tsp | Fine sea salt preferred |
| Walnuts 🥜 | 1 ½ cups | Chopped, toasted for filling |
| Light Brown Sugar 🍚 | ½ cup | Packed measurement |
| Ground Cinnamon 🌿 | 1 ½ tsp | Freshly ground preferred |
| Vanilla Extract 🍯 | 1 tsp | Pure extract preferred |
| Egg Wash 🥚 | 1 whole | 1 egg beaten with 1 tbsp water |
| Coarse Sugar 🍚 | ¼ cup | For topping before baking |
The yeast is your secret weapon here. Bob's Red Mill or Saf-Instant work best—check the expiration date, even if it's unopened. Walnuts? Trader Joe's or Costco have the best prices for bulk. Toast them yourself (350°F for 8-10 minutes) for maximum flavor—pre-toasted nuts lose punch fast. The flour matters too: King Arthur or Gold Medal give the best texture. Store your flour in the freezer if you're not using it weekly to keep it fresh.
No vanilla extract? Vanilla bean paste works too. Short on walnuts? Pecans or hazelnuts in a pinch, but walnuts are traditional. The brown sugar can be swapped for white if that's what you've got—just know it'll be slightly less moist. For the dough, if your kitchen's cold, warm the milk to 110°F before mixing with yeast. Too hot and you'll kill it. Too cold and it won't activate. The egg wash? Add a splash of milk if your egg is too thick to brush easily.
This dough needs time—at least 2 hours for rising, longer if your kitchen's chilly. Keep it covered with a damp towel. The filling can be prepped a day ahead and stored in the fridge. Once baked, slice it 15 minutes after removing from oven—that's when it's at its most tender. Leftovers? 3 days in an airtight container, or freeze the whole loaf for up to 3 months. Reheat slices in a toaster for that bakery-fresh crunch.
Why You'll Love This Recipe
- I’ll be real: these rolls are my go-to for lazy mornings and after-school treats. Toast them plain for a buttery breakfast, or slather with jam when company drops by. They’re the kind of thing that makes your house smell like home—no fancy plating needed.
- Here’s what sold me: flour, yeast, butter, eggs—ingredients I already have. No specialty items, no last-minute grocery runs. And they freeze like a dream, so I bake a batch on Sundays and pull them out all week when hunger hits. Zero waste, all reward.
Step-by-step instructions for authentic Polish nut roll
Here's how to make this classic Polish treat with perfect buttery layers and spiced walnut filling.
👨🍳 Step 1: Activate the Yeast and Mix the Dough
In a small bowl, combine the 0.75 cup warm milk (about 110°F) with the 0.25 cup granulated sugar and 2.25 tsp active dry yeast. Let it sit for 5-10 minutes until it becomes frothy—this confirms your yeast is active. If it doesn't bubble, your yeast might be dead and you'll need to start over.
In a large bowl, whisk together the 4 cups all-purpose flour and 0.5 tsp salt. Add the yeast mixture, 1 whole large egg, and 0.5 cup unsalted butter (cold, cubed). Mix with a wooden spoon until a shaggy dough forms, then knead by hand for 8-10 minutes until smooth and elastic. The dough should be slightly tacky but not sticky.
Here's the thing—don't rush the kneading. You're developing gluten that gives this roll its signature flaky layers. Cover the bowl with a damp towel and let it rise in a warm place for 1 hour or until doubled in size. I like to place my oven light on to create a warm environment.
🥘 Step 2: Prepare the Walnut Filling
While the dough rises, make the filling by toasting the 1.5 cups walnuts in a dry skillet over medium heat for 5-7 minutes until golden and fragrant. Let them cool slightly, then pulse in a food processor until finely chopped but not pasty.
In a small bowl, mix the toasted walnuts with 0.5 cup light brown sugar, 1.5 tsp ground cinnamon, and 1 tsp vanilla extract. The mixture should look moist but not wet—this ensures it binds properly when rolled into the dough. Taste it and adjust sweetness if needed (I usually add a pinch more sugar).
This filling is what makes the nut roll special—its warm cinnamon-walnut flavor pairs perfectly with the buttery dough. Keep it at room temperature until ready to use so it's easy to spread.
🍳 Step 3: Roll and Fill the Dough
Once your dough has doubled, punch it down and roll it out on a lightly floured surface into a 12x16-inch rectangle. I use a rolling pin to keep the thickness even—about ¼-inch thick. Spread the walnut filling evenly over the dough, leaving a ½-inch border around the edges.
Here's where it gets tricky: carefully roll the dough tightly from the long side, pinching the seam to seal. The filling should stay inside—if it leaks out, you'll have to start over. Trim the ends if needed and place the log seam-side down on a parchment-lined baking sheet. Cover with a towel and let it rise for another 30-45 minutes until puffy.
Don't skip this second rise—it develops the final texture. The dough should spring back slowly when pressed gently with your finger. If it springs back quickly, let it rise a bit longer.
🔥 Step 4: Bake to Golden Perfection
Preheat your oven to 350°F. Brush the risen nut roll with the 1 whole egg wash (1 egg beaten with 1 tbsp water) and sprinkle evenly with the 0.25 cup coarse sugar on top. Bake for 35-40 minutes until golden brown and internal temperature reaches 190°F.
Watch closely after 30 minutes—the sugar topping should be caramelized but not burned. If it browns too quickly, tent with foil. The nut roll is done when it sounds hollow when tapped on the bottom and the top is deep golden brown.
Let it cool on a wire rack for at least 15 minutes before slicing—this prevents the filling from oozing out. The warm spiced walnut aroma will fill your kitchen, and each slice will reveal those beautiful buttery layers with gooey cinnamon filling.
Pro Tips For Making Authentic Polish Nut Roll
- Chill the Dough Properly: Polish nut rolls demand patience—let the dough rest at least 2 hours in the fridge, ideally overnight. I used to skip this and ended up with dense, chewy rolls instead of the light, fluffy ones that separate cleanly when sliced. Cold butter stays firm, and the gluten relaxes for that perfect texture.
- Soften Butter Just Enough: The butter in the filling should be soft but not melted—press it with your finger, and it should hold a slight indent. If it’s too warm, the filling will leak out during baking; if too cold, the nuts won’t coat evenly. Room temp butter (about 1 hour out of the fridge) is your golden middle ground.
- Don’t Overwork the Dough: Polish nut rolls rely on delicate layers, not kneading strength. Handle the dough just until it clears the bowl—overmixing develops gluten, and your rolls will turn tough instead of tender. A few gentle stretches while rolling is enough; force isn’t your friend here.
- Brush with Egg Wash Twice: After shaping the rolls, give them a light coat of egg wash, then bake as directed. Once out of the oven, brush another thin layer while still warm. This double-step guarantees a glossy finish and prevents the tops from drying out—trust me, it’s the difference between "homemade" and "restaurant-quality."
Storing and reheating this recipe
Refrigerator Storage
Store your nut roll in an airtight container at 40°F or below for up to 3 days—the filling stays moist and flavorful when properly sealed. I use a glass Pyrex container with a snap-on lid to preserve freshness.
Let it cool completely before storing to prevent condensation, which can make the crust soggy. 🌟
Slice the nut roll 15 minutes after baking when it's still warm for clean cuts, then store the whole loaf. If you prefer individual portions, slice it first and stack slices with parchment paper between them to maintain crispness.
The spiced walnut aroma intensifies as it sits, making your kitchen smell like a Polish bakery!
Freezer Preservation
For longer storage, freeze the nut roll for up to 3 months—it's perfect for holiday prep or gifting. Wrap the whole loaf tightly in plastic wrap, then place it in a freezer-safe bag to prevent freezer burn.
Label with the date to track freshness. The texture remains excellent when thawed properly. ❄️
To thaw, transfer the frozen nut roll to the refrigerator overnight. Avoid microwave reheating—it ruins the delicate layers. Instead, slice and toast individual portions in a toaster oven at 350°F for 5-7 minutes to restore that bakery-fresh crunch.
Reheating Slices
For a quick refresh, reheat slices in a toaster for 20-30 seconds—this crisps the crust without drying out the filling. I prefer this method for single servings because it preserves the buttery layers.
If your toaster doesn't work well, try a skillet over low heat for 1-2 minutes per side until golden. 🔥
Avoid microwaving—it turns the filling rubbery. If you must, cover the slice with a damp paper towel and heat in 10-second bursts on low power, then finish in the toaster. The goal is to revive the crust's crispness while keeping the walnut filling gooey.
Reviving Stale Slices
If your nut roll loses crispness, revive it by wrapping slices in aluminum foil and baking at 350°F for 5 minutes. This steams the filling slightly while reheating the crust. For extra crunch, brush with egg wash and broil for 1-2 minutes at the end. 💡
Pro tip: Store slices in a paper bag at room temperature for up to 2 days—the paper absorbs excess moisture better than plastic. This trick keeps them fresher longer, especially in humid climates. The filling stays tender, and the crust regains its snap when reheated.
Nutrition facts
Frequently asked questions
What makes this Polish nut roll different from other sweet breads?
The key lies in the walnut-cinnamon filling and the yeast dough's buttery layers. Traditional Polish nut rolls use toasted walnuts blended with brown sugar and spices, creating a moist yet slightly crumbly texture that contrasts beautifully with the flaky crust. The rolling technique—pinching the seam tightly—ensures the filling stays contained while baking.
Can I substitute walnuts for another nut or seed?
Yes! While walnuts are traditional, you can use pecans, hazelnuts, or even sunflower seeds for a nut-free version. Toast them first to enhance flavor, then blend with the same spices. For texture, chop pecans slightly coarser than walnuts—they hold their shape better during baking.
Why did my nut roll fall apart when rolling?
This usually happens if the dough is too sticky (not enough kneading) or too dry (over-floured). Knead for 8-10 minutes until elastic, and roll on a lightly floured surface—just enough to prevent sticking. If the filling leaks, spread it closer to the edges and roll more tightly, pinching the seam firmly.
How do I serve this nut roll for special occasions?
Slice it 15 minutes after baking for clean cuts, then dust with powdered sugar or serve with whipped cream and fresh berries. For a festive touch, drizzle with warmed honey or sprinkle with crushed pistachios. It pairs perfectly with coffee or tea and makes an elegant dessert for holidays like Christmas or Easter.
Can I make this nut roll without yeast?
Traditional recipes use yeast for that signature fluffy texture, but you can adapt it with puff pastry or a sourdough starter. For puff pastry, spread the filling between layers and bake at 375°F for 25-30 minutes. The layers won't be as tall, but the flavor remains rich. For sourdough, replace the yeast with 1 cup active starter and adjust liquid as needed.