
Main Courses
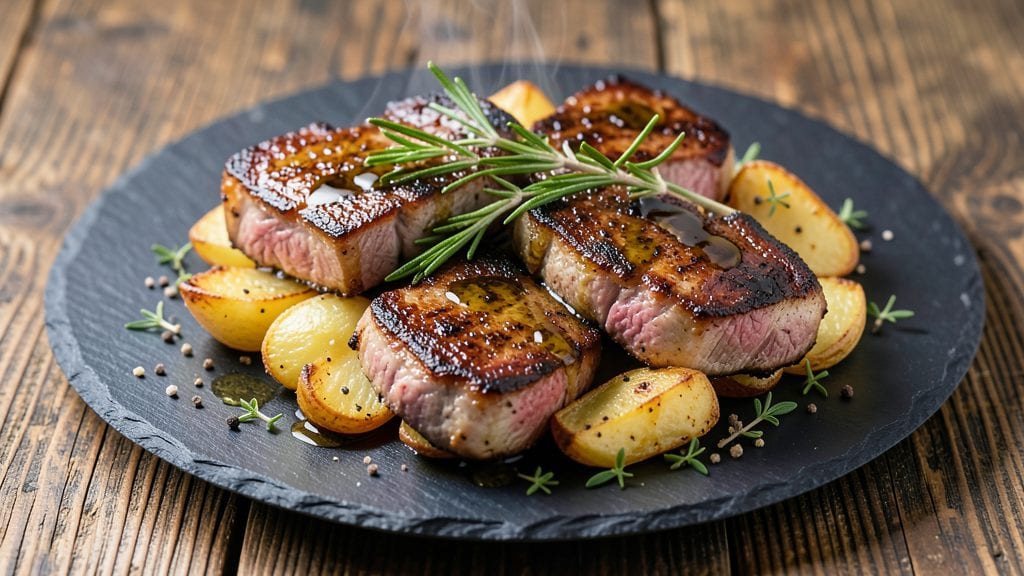
Mastering baked chops with a crispy-crusted exterior and juicy-core perfection is simpler than you think—this recipe delivers restaurant-quality results at home. The secret lies in a precise balance of seasoning, baking time, and a technique that locks in moisture while creating that coveted golden crust.
I've refined this method over countless batches, ensuring every chop stays tender inside while developing deep, savory flavors in the oven.
This approach combines classic methods with modern shortcuts: a dry brine enhances natural juiciness, while a breadcrumb-herb crust adds texture without sacrificing tenderness. The baking process is hands-off once set up, making it ideal for weeknight dinners or meal prep.
You'll need just 20 minutes of active prep time followed by 25 minutes of baking—well within a busy schedule.
What you'll achieve is pork chops with a crispy, caramelized crust that shatters slightly with each bite, revealing succulent meat underneath. The aroma alone will have everyone gathering at the table, while the flavor profile balances savory, slightly sweet, and herby notes.
This recipe works equally well with bone-in or boneless chops, giving you flexibility for any meal.
Serve with roasted potatoes, a fresh salad, or your favorite apple sauce to complete the meal. The technique scales perfectly for feeding a crowd, and leftovers reheat beautifully. Let's get started on creating chops that will impress even the most critical guests.
Ingredients for baked chops
Pantry staples meet fresh herbs for pork chops that crackle with crispy perfection.
| Ingredient | Amount | Notes |
|---|---|---|
| Bone-In or Boneless Pork Chops 🥓 | 4 whole | 1-inch thick, center-cut preferred |
| Extra-Virgin Olive Oil 🫒 | 2 tbsp | High-quality, fruity variety |
| Diamond Crystal Kosher Salt 🧂 | 1 ½ tsp | For dry brine |
| Freshly Ground Black Pepper 🌶️ | ½ tsp | Cracked peppercorns preferred |
| Fresh Rosemary Sprigs 🌿 | 2 whole | Thin stems for garnish |
| Fresh Thyme Leaves 🌿 | ¼ cup | Stems removed, chopped |
| Panko Breadcrumbs 🍞 | ½ cup | Light and crispy texture |
| Garlic Powder 🧄 | 1 tsp | Freshly ground preferred |
| Onion Powder 🧅 | ½ tsp | For depth of flavor |
| Unsalted Butter 🧈 | 2 tbsp | Melted, full-fat for richness |
| Honey 🍯 | 1 tbsp | For subtle sweetness |
| Apple Cider Vinegar 🍎 | 1 tsp | Brightens flavor profile |
| Fresh Parsley Leaves 🌿 | ⅛ cup | Chopped, for garnish |
The pork chops are your canvas—bone-in or boneless, but 1-inch thick is key for even cooking. Costco or your local butcher often carry center-cut chops, which stay juicier. If using bone-in, trim excess fat but leave a thin layer for flavor. The dry brine (salt applied 24 hours ahead) is non-negotiable—it keeps the meat moist while the crust develops. For fresh herbs, Whole Foods or local markets have the most vibrant thyme and rosemary, but grocery store bunches work if they smell fragrant and aren't wilted. Panko is your friend here—Trader Joe's sells it in bulk, and it stays crispy longer than regular breadcrumbs.
No fresh rosemary? Dried at one-third the amount works in a pinch, but the aroma is half the magic. Subbing honey for maple syrup? Use the same amount—both add sweetness, but honey has a deeper caramelization. Short on thyme? Dried oregano at half the quantity mimics its earthy notes. The butter and honey combo is where the real flavor happens—don't skip the full-fat butter (margarine won't cut it). For extra crispiness, broil the chops for 2-3 minutes at the end, watching like a hawk to avoid burning. The apple cider vinegar might seem odd, but it cuts through the richness and balances the sweetness beautifully.
Leftover chops reheat like a dream—350°F for 10 minutes wrapped in foil, then crisped under the broiler for 1 minute. Store them in an airtight container for 3 days or freeze for 3 months (portion into single servings first). The crust gets soggy if reheated too long, so keep it brief. For meal prep, assemble the chops with all seasonings the night before, then bake straight from the fridge—add 5 extra minutes to the baking time. The aroma alone will have your whole house gathering at the table.
Why You'll Love This Recipe
- One-Pan Magic: I swear by this recipe when I’m too tired to scrub a million dishes—just chops, rosemary, and a drizzle of olive oil on a sheet pan. The salt and pepper do all the work while you sip wine and pretend you’re a chef.
- Herb-Packed Punch: That rosemary isn’t just garnish—it infuses the meat with a bright, piney aroma that cuts through the richness. Honestly, the first time I tasted it, I nearly licked the pan clean.
- Weeknight to Dinner Party: Same recipe, totally different vibes. Toss it on the table for a lazy Tuesday or dress it up with a side salad for guests. Between us, the bone-in version feels fancier without extra effort.
- Budget-Friendly Protein: Pork chops are cheaper than chicken and more flavorful—no sad, dry leftovers here. I’ve made this with $5 chops and still had enough for lunch the next day. (Yes, even on a Tuesday night.)
Step-by-step instructions for crispy-crusted, juicy-core pork chops
Here's how to achieve that perfect balance of crispy crust and tender interior every time.
Prepare the Pork Chops for Maximum Flavor
Pat the 4 whole bone-in or boneless pork chops dry with paper towels—this is crucial for that crispy crust. I like to press firmly on all sides, especially the thickest parts, to remove any surface moisture that could prevent browning. Place them on a wire rack set over a baking sheet to ensure air circulates underneath.
In a small bowl, combine the 0.5 cup panko breadcrumbs, 1 tsp garlic powder, and 0.5 tsp onion powder. This dry rub will create our flavorful crust. I find using freshly ground spices makes a noticeable difference in the final result. Spread the chops out on a plate and season both sides generously with the 1.5 tsp diamond crystal kosher salt and 0.5 tsp freshly ground black pepper.
Create the Herb Butter Glaze
In a separate bowl, melt the 2 tbsp unsalted butter in the microwave for 15 seconds or until just softened. Add the 0.25 cup fresh thyme leaves, 2 whole fresh rosemary sprigs (chopped), 1 tbsp honey, and 1 tsp apple cider vinegar. Stir well and let the mixture sit for 2 minutes to allow the herbs to infuse their aromatic oils into the butter.
This herb butter isn't just for flavor—it's what creates that beautiful caramelized crust. The honey adds subtle sweetness that balances the savory herbs, while the vinegar brightens everything up. I like to taste it at this stage to ensure the seasoning is right before it goes on the chops.
Assemble and Bake for Perfect Texture
Preheat your oven to 425°F with the rack positioned in the middle position. This high temperature is key to getting that crispy crust while keeping the interior juicy. Working quickly, brush both sides of each pork chop with the 2 tbsp extra-virgin olive oil, then press the herb butter mixture onto all sides, coating evenly.
Press the seasoned breadcrumb mixture firmly onto each chop, covering completely. The reason we press gently is to ensure the crumbs adhere well and create that satisfying crunch. Place the chops on the prepared baking sheet and bake for 12-15 minutes, until the crust is golden brown and the internal temperature reaches 145°F when measured with an instant-read thermometer.
Rest and Garnish for Restaurant-Quality Results
Remove the chops from the oven and let them rest for 5 minutes on a wire rack. This resting period is essential—it allows the juices to redistribute throughout the meat so you get that first bite of pure juiciness. While they rest, chop the 0.125 cup fresh parsley leaves finely and set aside for garnish.
Slice the chops if desired (though I prefer them whole for maximum presentation), then drizzle any accumulated pan juices over the top. The crust should be crispy enough to hold its shape but still crunch satisfyingly, while the interior should be tender and juicy with just a hint of pink in the center. Garnish with the chopped parsley leaves just before serving for that restaurant-quality presentation.
Pro Tips For Making Baked Chops
- Preheat Like a Pro: Your oven should hit 425°F before the chops even hit the pan—no waiting. I used to load cold chops into a lukewarm oven and wondered why they never got that deep, caramelized crust. That extra 5 minutes of preheat makes all the difference when you’re baking bone-in chops.
- Salt the Night Before: Toss your chops in 1 teaspoon of kosher salt per pound and let them sit uncovered in the fridge overnight. Sounds weird, but it works: the salt breaks down the proteins just enough so they stay juicy instead of drying out in the oven. (Yes, even if you’re impatient like me.)
- Skip the Rosemary Sprigs: If your rosemary is old or woody, swap it for 1 teaspoon of finely chopped leaves mixed into the olive oil instead. Fresh sprigs are great, but when they turn to mush, you’re left with bitter stems—no one wants that in their dish.
- Bake Bone-In Side Down: Place bone-in chops bone-side down on the baking sheet first. The bone conducts heat faster, so the meat cooks more evenly, and you avoid the risk of the bone burning while the center stays cold. (I learned this the hard way after cutting into a raw middle.)
Pro cooking tips for perfect results
Dry Brine Magic
The dry brine technique is my secret weapon for juicy chops—apply the 1.5 tsp kosher salt at least 4 hours (or up to 24 hours) before baking. This allows the salt to penetrate deeply, breaking down proteins and locking in moisture.
I use Diamond Crystal kosher salt because its coarse texture clings better to the meat. For best results, place chops on a wire rack in the fridge uncovered—this ensures even salt distribution and prevents soggy crusts. 💡
Oven Temperature Control
Bake at 425°F for that perfect crispy crust while keeping the interior tender. A wire rack on your baking sheet is non-negotiable—it promotes even airflow and prevents steaming, which leads to soggy breadcrumbs.
I recommend preheating the oven for 15 minutes to ensure consistent heat. For extra insurance, use an instant-read thermometer to confirm 145°F internal temperature—this guarantees perfect doneness without overcooking. ⏰
Butter Infusion Trick
The herb butter isn't just flavor—it's the crust's foundation. Melt 2 tbsp unsalted butter with 1 tbsp honey and 1 tsp apple cider vinegar, then let it infuse with fresh thyme and rosemary for 2 minutes.
This creates a sticky, flavorful base that helps the panko breadcrumbs adhere perfectly. I press the butter mixture onto the chops before adding crumbs to maximize adhesion and crispiness. 🌿
Resting Matters
Never skip the 5-minute rest after baking—this is when juices redistribute, preventing dry chops. Place them on a wire rack (not a plate) to maintain crispiness. I also like to tent them loosely with foil if I'm worried about overcooking.
The crust will stay crispy while the meat stays juicy—trust the process! The first bite is always worth the wait. ✨
Broil for Extra Crisp
For ultra-crispy chops, transfer them to a broiler-safe pan after 10 minutes in the oven and broil for 2-3 minutes. Watch closely—broilers can scorch quickly! This step adds a deep caramelization that takes your chops to restaurant-level perfection.
Just be prepared to work fast once you see that golden crust forming. 🔥
Equipment Essentials
Invest in a wire rack (I use OXO Good Grips) and instant-read thermometer (like ThermoWorks Smoke)—these are game-changers. A lightweight baking sheet (preferably half-sheet size) ensures even heat distribution.
For extra crispiness, I sometimes use parchment paper with holes to catch drippings while allowing airflow. These tools make all the difference in professional results. 💪
Nutrition facts
Frequently asked questions about baked pork chops
Can I use boneless chops instead of bone-in for this recipe?
This recipe works perfectly with boneless chops—just ensure they're 1-inch thick for even cooking. Bone-in chops add flavor but aren't required. The crust and seasoning techniques remain identical, so you'll still get that same crispy exterior and juicy interior.
What's the best way to store leftover baked chops?
Store leftovers in an airtight container for up to 3 days in the fridge. For longer storage, freeze for 3 months—wrap individually in plastic wrap first. To reheat, bake at 350°F for 10 minutes wrapped in foil, then broil for 1 minute to restore crispiness. Never reheat uncovered to avoid drying out.
Why do my chops come out dry even with the crust?
Dry chops usually mean overcooking or skipping the resting time. Always use a thermometer to check 145°F internal temp—never guess by time. Also, pat chops completely dry before seasoning and avoid crowding the pan. The 5-minute rest is crucial—it lets juices redistribute.
Can I make these chops ahead of time?
Yes! Assemble the chops with all seasonings the night before and refrigerate uncovered on a wire rack. Bake straight from the fridge, adding 5 extra minutes to the baking time. The dry brine method actually improves flavor when done ahead. Just be sure to bring them to room temp for 15 minutes before baking.
What's the best side dish to serve with these chops?
Classic pairings include roasted potatoes (tossed with rosemary and garlic), creamy mashed potatoes, or a fresh green salad with balsamic vinaigrette. For a sweet contrast, serve with apple sauce or sautéed apples. The crispy crust works beautifully with anything that balances its richness.