
Side Dishes
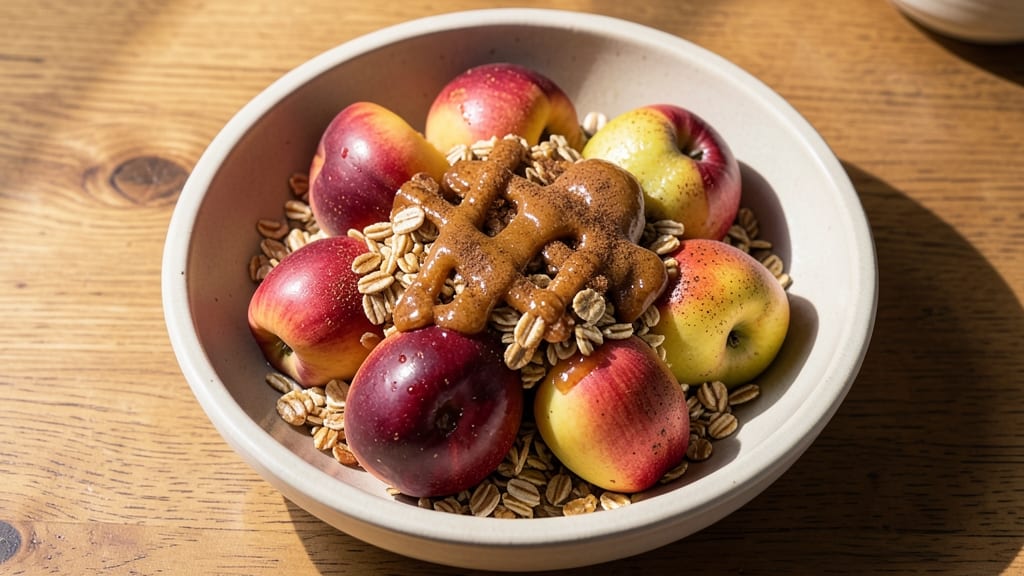
This baked fruit recipe transforms simple seasonal produce into a warm, spiced dessert that tastes like autumn in every bite. The secret lies in caramelizing the fruit until tender while topping it with a cinnamon-oat crunch that adds texture and depth.
I developed this version after years of testing—it’s foolproof for both beginners and experienced bakers, delivering restaurant-quality results with minimal effort.
The beauty of this recipe is its versatility. Use it as a standalone dessert after dinner or serve it warm as a snack with vanilla ice cream.
The spiced topping—made with rolled oats, cinnamon, and a touch of brown sugar—creates a satisfying crunch that contrasts perfectly with the soft, caramelized fruit underneath. It’s also naturally vegetarian and can be easily adapted for vegan diets by using plant-based butter.
What you’ll end up with is a dish that smells like a cozy kitchen, with golden-brown fruit bubbling beneath a fragrant cinnamon crust. The caramelized edges are sweet and tender, while the crunchy topping adds a delightful contrast. This recipe works with apples, pears, peaches, or even berries—whatever’s in season.
Perfect for holidays, potlucks, or a simple weeknight treat, this baked fruit dish is the kind of dessert that feels special without requiring hours in the kitchen. Let’s get started—your taste buds will thank you.
Ingredients for baked fruit
Seasonal fruit, warm spices, and a crunchy cinnamon-oat crown—this dessert tastes like autumn in every bite.
| Ingredient | Amount | Notes |
|---|---|---|
| Seasonal Fruit (Apples, Pears, or Peaches) 🍎🍐🍑 | 4 cups | Peeled, cored, sliced evenly |
| Unsalted Butter 🧈 | ½ cup | Cold, cubed for topping |
| Rolled Oats 🌾 | 1 cup | Old-fashioned, not quick oats |
| Light Brown Sugar 🍚 | ½ cup | Packed tightly for sweetness |
| Ground Cinnamon 🌿 | 2 tbsp | Freshly ground preferred |
| Granulated Sugar 🍬 | ¼ cup | For fruit caramelization |
| Vanilla Extract 🌸 | 1 tsp | Pure, not imitation |
| Salt 🧂 | ½ tsp | Diamond Crystal kosher |
| Lemon Juice 🍋 | 1 tbsp | Freshly squeezed |
| Ground Nutmeg 🌶️ | ½ tsp | Freshly grated for depth |
| Heavy Cream (or Coconut Milk for vegan) 🥛 | ¼ cup | Optional for extra richness |
| Vanilla Ice Cream (for serving) 🍦 | 1 ½ cups | High-fat for best pairing |
The fruit is the star, so pick whatever’s at peak season—Honeycrisp apples or Bosc pears hold up best to baking. I grab mine from Whole Foods or local farmers markets where they’re firm and fragrant. If using peaches, white freestone varieties stay intact better. Slice them evenly (about ¼-inch thick) so they caramelize at the same rate. For extra tenderness, toss the fruit with a splash of lemon juice right after slicing—keeps it from browning while you prep the rest.
No rolled oats? Quick oats pulse-blended into a fine powder work in a pinch, but they lack that perfect crunch. Running short on butter? Coconut oil or vegan butter keeps it plant-based without sacrificing texture. The brown sugar should be packed tightly—don’t scoop it loosely, or you’ll end up with a drier topping. For nutmeg, freshly grated from a whole nutmeg makes a world of difference (I buy them at Penzeys when they’re on sale). And if you’re feeling fancy, a pinch of cardamom in the topping adds a sophisticated twist.
This dessert reheats beautifully—just 10 seconds in the microwave with a splash of water revives that cozy, caramelized texture. Store leftovers in an airtight container for up to 5 days (if they last that long). The topping stays crisp for 3 days if you keep the fruit and topping separate. For make-ahead magic, assemble the dish the night before and bake straight from the fridge—it’ll smell like a bakery when it comes out. Portion into individual ramekins for easy serving at potlucks.
Why You'll Love This Recipe
- Five-Ingredient Magic: I swear by this combo—just fruit, butter, oats, sugar, and cinnamon. No fancy techniques, no last-minute store runs. Honestly, I’ve made it with whatever fruit was on sale, and it never fails.
- Caramelized Edge, Soft Core: That crisp-tender contrast? Chef’s kiss. The brown sugar melts into the fruit while the oats toast into a crunchy blanket—like a hug for your taste buds. Between us, I’ve never seen pears this good without hours in the oven.
- Breakfast or Dessert: Serve it warm with yogurt for a lazy morning, or drizzle with honey for a no-fuss after-dinner treat. My kids grab it straight from the pan (yes, even on a Tuesday night), and my husband sneaks seconds when he thinks I’m not looking.
Step-by-step instructions for caramelized baked fruit with cinnamon crunch
This method transforms ordinary fruit into a warm, spiced dessert with irresistible texture—crispy oat topping meets tender, caramelized fruit.
Prepare the Fruit for Maximum Flavor
Start by peeling, coring, and slicing the 4 cups seasonal fruit into even ¼-inch thick pieces. Apples and pears work best when sliced slightly thicker than peaches to hold their shape during baking. Toss the fruit in a large bowl with 1 tablespoon lemon juice and 0.25 cup granulated sugar, mixing until the sugar dissolves and the fruit begins to glisten.
This sugar-fruit mixture is crucial—it creates a natural caramelization as the fruit bakes. The lemon juice prevents browning and adds brightness that balances the sweetness. Let the fruit sit for 10 minutes while you prepare the topping, allowing the flavors to meld slightly. You'll notice the fruit softens just enough and releases its juices, which will later create a syrupy sauce at the bottom of the dish.
Create the Spiced Oat Topping
In a separate bowl, combine 1 cup rolled oats, 0.5 cup light brown sugar, 2 tablespoons ground cinnamon, 0.5 teaspoon salt, and 0.5 teaspoon ground nutmeg. Mix thoroughly until the spices are evenly distributed throughout the oats. The nutmeg adds a warm, earthy depth that pairs perfectly with the cinnamon's sweetness.
Cut 0.5 cup unsalted butter into small cubes and fold them into the oat mixture using your fingers. The butter should coat the oats evenly, creating small clumps that will brown beautifully in the oven. If using 0.25 cup heavy cream (or coconut milk for vegan), drizzle it over the mixture and stir until just combined—this adds moisture that helps the topping crisp rather than burn.
Assemble and Bake for Perfect Texture
Preheat your oven to 375°F and grease a 9x13-inch baking dish lightly with butter or oil. Spread the prepared fruit evenly in the dish, pressing down gently to create a single layer. This ensures even baking and prevents some pieces from steaming while others overcook.
Sprinkle the oat mixture evenly over the fruit, pressing down lightly with your fingers or the back of a spoon. The goal is to create a continuous layer that will crisp up beautifully. Bake for 25-30 minutes until the fruit is tender and the oat topping is golden brown with crisp edges. The fruit should release easily when gently prodded with a fork, and the topping should pull away slightly from the fruit.
Finish with Vanilla and Serve Warm
Remove the dish from the oven and let it cool for 5 minutes. While it cools, stir in 1 teaspoon vanilla extract and 1 tablespoon lemon juice into the fruit mixture. This step brightens the flavors and ties everything together. The fruit should be glistening slightly from the juices released during baking.
Serve immediately with 1.5 cups vanilla ice cream on the side or dolloped on top of each portion. The contrast of warm, spiced fruit against the cold ice cream is what makes this dessert truly special. For an extra touch, garnish with a sprinkle of fresh cinnamon or a few extra oats for that irresistible crunch.
Pro Tips For Making Baked Fruit
- Preheat Like It’s 1985: DESCRIPTION: Your oven needs 15 minutes to hit 375°F—yes, even if you’re using a fancy new model. I learned this the hard way when my peaches turned mushy instead of caramelized, and it’s not because I’m bad at cooking. Give the oven time to stabilize, especially if you’re swapping between baked goods and fruit.
- Core the Fruit: DESCRIPTION: Apples and pears are sneaky—they’ll leak juice and steam like crazy if you skip this. Use a melon baller or small spoon to scoop out the center, then slice them ½-inch thick. Trust me, your oat topping won’t stick if you ignore this step.
- Toast the Oats First: DESCRIPTION: Dump the rolled oats in a dry skillet over medium heat for 3-4 minutes until they smell toasty. This cuts down on baking time and gives your topping that crunchy, buttery texture that tastes like a hug. (Yes, even if you’re impatient like me.)
- Butter the Dish Like a Pastry Chef: DESCRIPTION: Don’t just dot the butter—melt 2 tablespoons in the baking dish first, swirling it around with a spoon. This keeps the fruit from sticking and adds a rich, golden crust. I was skeptical until I tried it, and now I’d never go back.
Essential equipment for perfect results
Baking Dish Essentials
For this recipe, I recommend using a 9x13-inch baking dish—it’s the perfect size for even heat distribution and easy serving. A lightly greased glass or ceramic dish works best because it conducts heat evenly and prevents sticking.
I swear by Pyrex dishes for their durability and consistent results. If you’re baking for a crowd, consider a 9x13-inch stoneware dish for that extra rustic texture. 🔥
Oven Thermometer
Your oven’s temperature gauge can be off by 25°F or more, which drastically affects baking times. I always use a Thermoworks Oven Thermometer to ensure my oven hits 375°F accurately.
Place it near the dish while preheating—this small investment prevents undercooked fruit or burnt toppings. For budget-friendly options, OXO Good Grips offers reliable alternatives.
Mixing Bowls
Use two medium-sized mixing bowls—one for the fruit and another for the oat topping. A stainless steel bowl works best for the fruit to prevent browning, while a glass bowl lets you see the even distribution of spices in the oat mixture.
I keep a set of nesting bowls from Le Creuset for this exact purpose—they’re sturdy and easy to clean. 🌟
Measuring Tools
Precision matters, especially with spices and sugars. I rely on a stainless steel measuring set (like OXO’s) for accuracy. For the rolled oats, use a 1-cup dry measure and press lightly to avoid overfilling.
A microplane is essential for freshly grating nutmeg—it makes all the difference in flavor. Avoid scooping flour or spices directly from containers; use a small spoon to level off measurements.
Optional: Ice Cream Scoop
Serving this dessert with ice cream is a game-changer, and a 3-tbsp ice cream scoop makes portioning effortless. I love the Bertolli silicone scoop—it’s gentle on delicate ice cream textures and easy to clean.
For a budget pick, any stainless steel scoop works just as well. If you’re serving at a potluck, pre-portion the ice cream into small ramekins for convenience. ✨
Storage Containers
Leftovers deserve proper storage. Use airtight glass containers (like Rubbermaid or Kirkland Signature) to keep the topping crisp for up to 3 days. For longer storage, freeze individual portions in silicone molds—they reheat beautifully in the microwave for 10-15 seconds.
Label containers with dates to track freshness. Pro tip: Store the fruit and topping separately if you’re not baking immediately. 💡
Nutrition facts
Frequently asked questions
What fruits work best for this baked dessert?
Seasonal fruits like Honeycrisp apples, Bosc pears, or white freestone peaches hold up beautifully. For extra tenderness, slice them ¼-inch thick—thinner slices caramelize faster. Avoid overly watery fruits like berries unless you drain them first.
Can I make this recipe vegan?
Swap unsalted butter for coconut oil or vegan butter and use coconut milk instead of heavy cream. The oat topping stays crispy, and the fruit remains perfectly tender. Just ensure your vanilla extract is vegan-certified.
Why is my oat topping soggy instead of crispy?
Soggy toppings usually mean too much moisture. Check if you used quick oats (they absorb liquid faster) or added extra cream. For crispiness, press the topping lightly after baking and let it cool 5 minutes before serving. Pre-baking the oat mixture for 5 minutes before adding to fruit can also help.
How do I store leftovers to keep the topping crisp?
Store the fruit and topping separately in airtight containers for up to 5 days. Reheat fruit alone for 10 seconds in the microwave, then top with fresh oats. For longer storage, freeze portions in silicone molds—they reheat perfectly with 15 seconds of microwave time.
Can I use this recipe for a crowd?
Yes! Double the recipe and use a 9x13-inch stoneware dish or two 8x8-inch pans. For easy serving, portion into individual ramekins before baking. Pre-portion ice cream too—it’s a lifesaver at potlucks!