
Side Dishes
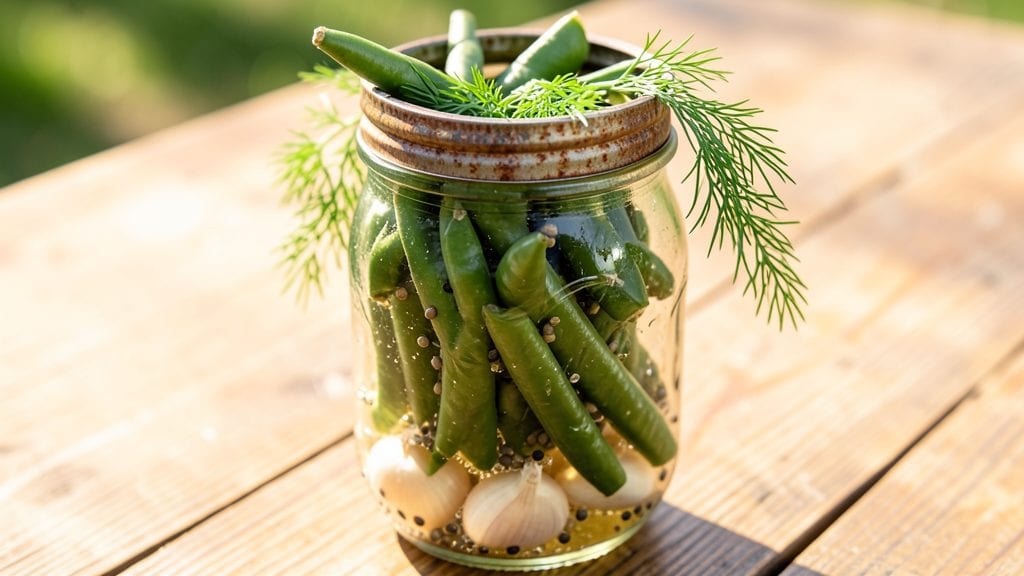
This canning pickled green beans recipe transforms fresh harvests into tangy, crunchy bites that elevate sandwiches and salads with bright vinegar-kissed flavor all year. The key to perfect pickled green beans lies in balancing acidity and texture—using the right vinegar-to-water ratio ensures both safety and flavor preservation.
I’ve perfected this method over years of testing, guaranteeing jars that stay crisp and tangy for months.
This recipe transforms fresh green beans into a vibrant, tangy side dish through a simple yet precise process. Sterilizing jars and lids is non-negotiable for food safety, while the brine—made with white vinegar, water, and spices—penetrates each bean for that signature vinegar-bright flavor.
The boiling water bath process seals in freshness, ensuring your jars stay safe and delicious for up to a year.
By following these steps, you’ll end up with jars of pickled green beans that are perfectly crunchy, tangy, and ready to elevate any meal. The process is straightforward but requires attention to detail, particularly when packing beans tightly and processing them for the correct time.
Once cooled and sealed, these jars become a versatile addition to your pantry, ready to brighten sandwiches, salads, or even charcuterie boards.
Whether you’re a seasoned canner or new to preserving foods, this recipe delivers professional results with simple techniques. The combination of vinegar, salt, and spices creates a flavor profile that’s both bold and balanced, making these pickled green beans a go-to for quick, flavorful sides.
Let’s get started on preserving your harvest the right way.
Ingredients for canning pickled green beans
Six jars of vinegar-bright green beans ready to transform your pantry into a crunchy treasure chest.
| Ingredient | Amount | Notes |
|---|---|---|
| Fresh Green Beans 🥦 | 2 ½ lbs | Harvest-size, trimmed ends |
| White Vinegar 💧 | 3 cups | Distilled, 5% acidity minimum |
| Water 💧 | 1 cup | Filtered or boiled for clarity |
| Diamond Crystal Kosher Salt 🧂 | 1 ½ tbsp | Not iodized, for proper brine |
| Garlic Cloves 🧄 | 6 cloves | Peeled, smashed slightly |
| Mustard Seeds 🌶️ | 1 tsp | Yellow or brown preferred |
| Black Peppercorns 🌶️ | 1 tsp | Freshly cracked preferred |
| Dried Dill 🌿 | 1 tsp | Or 1 tbsp fresh chopped |
| Red Pepper Flakes 🔥 | ½ tsp | Adjust for heat preference |
| Bay Leaves 🍃 | 2 whole | Fresh or dried, removed before serving |
| Pint-Sized Mason Jars 🍶 | 6 whole | With lids and rings, sterilized |
The green beans are the star—harvest-size, about 4-5 inches long, gives you that perfect crunch. Local farmers markets often have the freshest, but grocery store beans work too if they're firm and bright green (no slimy ends!). Trim the ends cleanly with a knife—no need to peel. For best flavor, use beans within 2 days of picking. If you're canning a big batch, Ball jars are my go-to—they seal like a dream. Sterilize them in boiling water for 10 minutes before packing, and keep them hot until you're ready to fill.
No white vinegar? Apple cider vinegar works too—just add an extra pinch of salt to balance the sweetness. Short on mustard seeds? Skip them entirely or use a pinch of ground mustard instead. The garlic can be minced instead of smashed if you prefer—just don’t skip it, it’s the secret to depth. For heat lovers, bump the red pepper flakes to 1 tsp. If you’re new to canning, test your jars by filling them with cold water—if they hold, they’re sealed properly. And trust me, the first time you open a jar and hear that satisfying pop, you’ll be hooked.
These jars keep for up to a year in a cool, dark pantry—perfect for gifting or stashing for winter. Once opened, store in the fridge and use within 3 months. The beans stay crisp for about 3 weeks in the jar, but the flavor only gets better with time. I always make an extra jar or two—they disappear fast on sandwiches, charcuterie boards, or even as a snack with crackers. Label your jars with the date and contents; a sharpie on the lid works great. And if you’re feeling fancy, add a sprig of fresh dill on top before sealing—it looks gorgeous and adds a little extra flavor.
Why You'll Love This Recipe
- No-Fuss Canning: I swear by this recipe because it’s the kind of project you can tackle while chatting with a friend—just trim those beans, layer them in jars, and pour the brine. No fancy tools, no stress, just a pot, a ladle, and 20 minutes of your time.
- Garlic-Kissed Tang: That first bite? Chef’s kiss. The vinegar cuts through the fresh beans’ crispness while the garlic—smashed right into the jar—adds a punchy, aromatic depth. It’s the kind of flavor that makes you reach for the jar mid-meal, no matter what else is on the table.
- Year-Round Pantry Hero: Honestly, I make a big batch every summer, but these beans last months in the fridge (or years if canned properly). Toss them into sandwiches, pasta, or just eat them straight—no guilt, no waste, just reliable goodness whenever you need it.
- Budget Stretch: Fresh green beans can get pricey, but this recipe turns a small bag into a mountain of preserved flavor. Plus, vinegar and salt are dirt cheap—you’re basically getting restaurant-quality pickles for pennies. My wallet thanks me every time.
Step-by-step instructions for canning pickled green beans
Here's how to create vibrant, crunchy pickled green beans that stay fresh for months in your pantry.
Prepare the Green Beans for Canning
Trim the ends from the 2.5 lbs of fresh green beans, removing any discolored or tough stems. I like to snap them by hand at the natural break points—this ensures uniform length and prevents bruising. Leave the beans whole or cut them into 2-3 inch lengths if you prefer shorter pieces. Give them a quick rinse under cold water to remove any dirt or sand, then drain thoroughly in a colander.
This preparation step is crucial for even cooking and preservation. If you notice any blemished beans, remove them now to maintain the crisp texture of your final product. The beans should look bright green and firm, with no signs of wilting or soft spots. Spread them out on a clean kitchen towel to air-dry completely before proceeding—this helps prevent mold during the canning process.
Sterilize Jars and Prepare the Brine
Place the 6 whole pint-sized mason jars in a large pot and cover with water. Bring to a boil for 10 minutes to sterilize them completely. Meanwhile, combine the 3 cups of white vinegar, 1 cup of water, and 1.5 tbsp of diamond crystal kosher salt in a large saucepan. Bring this mixture to a boil over medium-high heat, stirring until the salt dissolves completely.
This brine solution creates the perfect acidic environment for safe preservation while enhancing the beans' flavor. The vinegar's acidity helps prevent bacterial growth, which is essential for proper canning. Keep the brine at a simmer while you prepare the remaining ingredients—you'll want to work quickly once everything is ready to maintain the sterilized state of your jars.
Add Aromatics to Each Jar
While the brine simmers, distribute the seasonings evenly among the jars. Add 1 smashed garlic clove, ¼ tsp mustard seeds, ¼ tsp black peppercorns, ⅛ tsp dried dill, and ⅛ tsp red pepper flakes to each of the 6 jars. Place 1 bay leaf in each jar as well. Gently shake each jar to distribute the spices evenly along the sides—this ensures flavor in every bite.
Here's the thing—don't overcrowd the jars. The beans should have room to expand slightly during processing. I find that packing them too tightly can lead to soft beans in the final product. Leave about 1 inch of headspace at the top of each jar, as you'll be adding the hot beans and brine next.
Pack Beans and Pour Hot Brine
Using a slotted spoon, carefully pack the prepared green beans into each jar, leaving the 1 inch headspace. Distribute them evenly so they're not all clustered at the bottom. Pour the hot brine from the saucepan over the beans, filling each jar to within ½ inch of the rim. Use a non-metallic utensil to gently press down on the beans to remove any air bubbles trapped between them.
This step is where attention to detail pays off. The hot brine helps sterilize the beans as they're packed, and the proper headspace prevents the jars from sealing incorrectly. Wipe the rims of the jars with a clean, damp cloth to remove any residue that might interfere with sealing. This ensures an airtight seal that keeps your pickled beans safe for months.
Process and Seal the Jars
Place the lids on the jars and screw on the rings until they're fingertip-tight. Transfer the jars to a large pot fitted with a canning rack or towel at the bottom. Fill the pot with water until the jars are completely submerged, leaving 1 inch of water above them. Bring the water to a gentle boil over medium heat, then process for 10 minutes.
The gentle boiling process helps create a vacuum seal as the jars cool. You'll know they've sealed properly when the lids pop down and make a satisfying clicking sound. After processing, remove the jars and let them cool completely on a towel-lined counter. Once cooled, check the seals by pressing down on the center of each lid—it should not pop up. Store the sealed jars in a cool, dark place for up to 1 year.
Pro Tips For Making Canning Pickled Green Beans
- Blanch Before Packing: Drop those green beans into boiling water for 3 minutes first—yes, even if you’re canning them. I learned this the hard way when my beans stayed stubbornly crisp after months on the shelf. The quick blanch softens them just enough to absorb the brine properly while keeping them from turning mushy later.
- Measure Salt Precisely: Diamond Crystal kosher salt is not the same as table salt—use exactly what the recipe calls for, or your beans will taste either bland or overwhelmingly salty. I used to eyeball it, and my first batch of pickles was inedible. Grab a kitchen scale if you’re unsure; 1 teaspoon per pint jar is your target.
- Keep Jars Steaming: After filling the jars, place them in a pot of simmering water—not boiling—with the lids just off the surface. The gentle steam drives out air bubbles trapped in the brine, which prevents moldy jars down the line. I skipped this once and lost half my batch to spoilage.
- Smash Garlic Lightly: Don’t chop the garlic cloves—just smash them with the flat side of your knife. This releases flavor without turning the brine bitter, and the whole cloves stay intact for easy eating. I used minced garlic once, and the pickles tasted sharp and medicinal. (Your future self will thank you.)
Common mistakes when making your canning pickled green beans
Overcrowding Jars
Packing beans too tightly is a common mistake that leads to soft, mushy pickled green beans. Leave at least 1 inch of headspace between the beans and jar rim—they’ll expand slightly during processing.
I’ve learned this the hard way: once, I packed jars too full and ended up with beans that lost their crispness. Use a slotted spoon to distribute them evenly, avoiding clusters at the bottom. This ensures proper heat penetration and maintains that satisfying crunch. 🥦
Skipping Sterilization
Never skip sterilizing jars, lids, and tools—this is non-negotiable for food safety. I’ve seen beginners rush this step, and it can lead to spoilage or botulism. Sterilize jars in boiling water for 10 minutes and keep them hot until packing.
Use a clean, damp cloth to wipe jar rims before sealing to remove any residue that might prevent a proper seal. Trust me, the extra 15 minutes of prep time is worth the peace of mind. ❄️
Incorrect Brine Ratio
The vinegar-to-water ratio is critical for both flavor and safety. Using too little vinegar (3 cups minimum for this recipe) risks bacterial growth, while too much can make the beans overly sour. Stick to the 3:1 vinegar-to-water ratio and always use white vinegar with 5% acidity or higher.
I once used apple cider vinegar without adjusting the salt, and the flavor was off-balance. When in doubt, measure carefully—precision here makes all the difference. 💧
Improper Headspace
Headspace—the gap between the jar contents and lid—must be exactly ½ inch after adding brine. Too much leaves room for air, leading to spoilage, while too little can cause jars to fail to seal. Use a headspace measuring tool or a ruler to ensure accuracy.
I recommend filling jars to ½ inch from the rim before processing, then adjusting after cooling if needed. This small detail keeps your pickled beans safe and delicious for months. 📏
Under-Processing Jars
Processing time varies by altitude—10 minutes at sea level is standard, but add 5 minutes for every 1,000 feet above sea level. I once processed jars for only 8 minutes at 3,000 feet and had to re-can them.
Always check your altitude and adjust accordingly. Use a timer and maintain a gentle boil throughout the process to ensure proper sterilization. 🌡️
Ignoring Seal Quality
Not all sealed jars are safe jars. After processing, check for proper seals by pressing the center of each lid—it should not flex up. If any jars don’t seal, refrigerate and use within 1 week or reprocess them immediately.
I’ve had jars fail before, and it’s always better to be safe than sorry. Store sealed jars in a cool, dark place, and label them with the date to track freshness. 🔍
Nutrition facts
Frequently asked questions
Why do I need to sterilize the jars before canning?
Sterilizing jars eliminates bacteria and mold that could spoil your pickled green beans. Boiling jars for 10 minutes and keeping them hot until packing ensures a safe, long-lasting seal. This step is critical for preventing foodborne illnesses and maintaining crisp texture. Never skip it—your family's safety depends on it!
Can I use apple cider vinegar instead of white vinegar?
Yes, but you'll need to adjust the salt slightly—apple cider vinegar has a milder flavor and lower acidity. Use 1.75 tbsp of salt instead of 1.5 tbsp to compensate. The beans will have a sweeter, fruitier taste but still maintain proper preservation. For best results, stick with white vinegar for classic tang.
How do I know when the jars are properly sealed?
After cooling completely, press the center of each lid—it should not flex up when pushed down. You'll also hear a satisfying pop as the jars seal during processing. If any lids pop up after cooling, refrigerate those jars and use within 1 week or reprocess them immediately. Always check seals before storing!
Can I add fresh herbs to the jars before sealing?
Fresh herbs like dill or parsley can be added, but they'll wilt during processing. For best results, use 1 tbsp chopped fresh dill per jar and place it on top of the beans before adding brine. The flavor will still infuse beautifully, though the texture will be softer. Dried herbs work better for maintaining jar integrity.
How long will these pickled green beans keep?
Properly sealed jars stored in a cool, dark pantry will stay fresh for up to 1 year. Once opened, transfer to the refrigerator and use within 3 months for best quality. The flavor actually improves with time—these make fantastic holiday gifts! Label jars with the date to track freshness.