
Sauces & Condiments
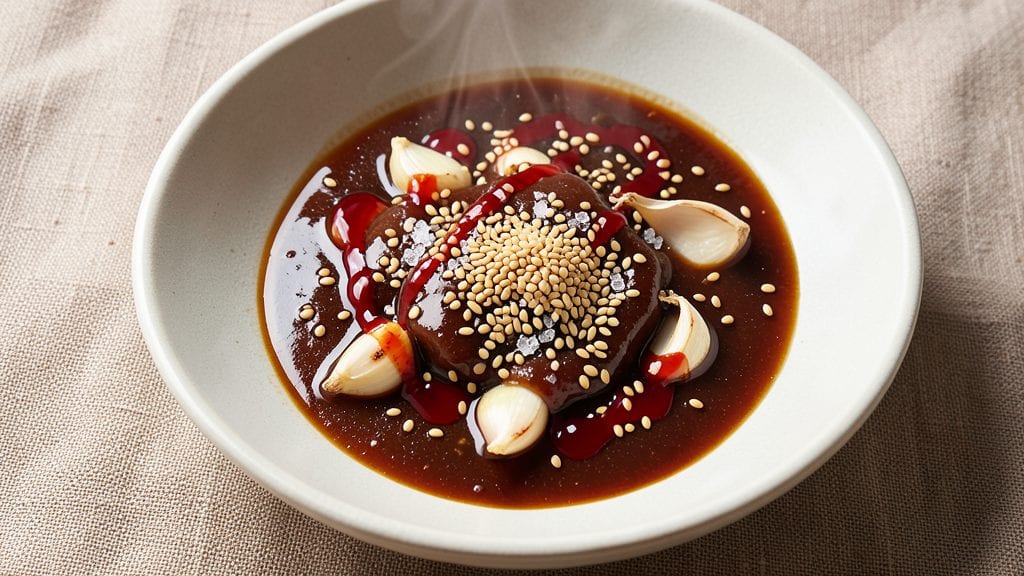
Chang's sauce recipe transforms ordinary stir-fries into restaurant-quality meals with just a few simple ingredients and minutes of prep. This umami-packed sauce balances sweet, salty, and tangy flavors, making it the secret weapon behind countless takeout favorites.
I developed this version after years of testing—it delivers that perfect harmony of soy, sesame, and vinegar without any complicated techniques.
The beauty of this sauce lies in its versatility—it elevates stir-fries, marinades, and even dipping sauces with minimal effort. Just combine soy sauce, rice vinegar, sesame oil, sugar, and a touch of garlic for authentic depth.
The sauce thickens naturally as it sits, creating that signature glossy finish that clings to every bite. Professional results in under 10 minutes.
What you'll end up with is a rich, aromatic sauce that's bold enough to stand up to wok-cooked vegetables and meats. The balance of flavors—sweet from the sugar, tangy from the vinegar, and umami from the soy—creates a complex taste profile that's addictive in the best way.
This is the kind of sauce that turns weeknight dinners into memorable meals.
Store it in the fridge for up to a week, or freeze for longer shelf life. Use it fresh for maximum flavor impact, but don't be surprised if it disappears faster than you can say "stir-fry night." Here's how to make it—simple, foolproof, and packed with flavor.
Ingredients for chang's sauce
Five core ingredients plus a few finishing touches—this is the secret to restaurant-quality stir-fry sauce.
| Ingredient | Amount | Notes |
|---|---|---|
| Light Soy Sauce 🥄 | ½ cup | Use high-quality light soy for depth |
| Rice Vinegar 🍶 | ¼ cup | White or seasoned, unseasoned preferred |
| Sesame Oil 🫒 | 2 tbsp | Toasted sesame oil for aroma |
| Granulated Sugar 🍚 | 2 tbsp | White or brown sugar works |
| Garlic Cloves 🧄 | 3 cloves | Freshly minced for authentic flavor |
| Cornstarch 🌾 | 1 tsp | For thickening, optional for gloss |
| Water 💧 | ¼ cup | Room temperature preferred |
| Sesame Seeds 🌰 | 1 tbsp | Toasted for garnish, optional |
The soy sauce is your flavor foundation—Kikkoman or Pearl River Bridge are my go-tos, but any good light soy works. For vinegar, seasoned rice vinegar adds subtle sweetness, but unseasoned lets you control the tang. Sesame oil? Toasted, not flavored—the nutty aroma is non-negotiable. The sugar balances everything, but don't skip it—this isn't just soy sauce. Garlic cloves should be fresh, not jarred. If you're using a pre-minced jar, toast the minced pieces in oil first to wake up the flavor. Cornstarch is optional but gives that signature glossy finish—worth it if you're serving guests.
No sesame oil? Toasted peanut oil at half the amount works in a pinch, though it'll taste different. Running low on rice vinegar? Apple cider vinegar plus 1 tsp sugar mimics the sweetness. Fresh garlic a no-go? Garlic powder at 1/4 the amount is better than nothing. For the cornstarch thickening, mix it with cold water first to avoid clumping. Want extra umami? Add 1 tsp fish sauce or 1/2 tsp MSG—trust me, it elevates everything. And if you're feeling fancy, a pinch of white pepper adds depth without overpowering.
This sauce keeps 1 week in the fridge, sealed tight—it actually tastes better after sitting overnight as flavors meld. For longer storage, freeze in ice cube trays—perfect for single-use portions. Reheat gently in a saucepan or microwave until just warm. Pro tip: Stir in a splash of hot water if it thickens too much when reheating. And if you make a double batch? Freeze half immediately—you'll thank me later when you're craving takeout flavors on a Tuesday night.
Why You'll Love This Recipe
- Here’s what sold me: this sauce lives in my fridge for weeks, and it doesn’t skimp on taste. Drizzle it on takeout noodles, toss it with stir-fried veggies, or even use it as a marinade—it’s the one sauce that makes lazy nights feel intentional.
- I’ll be real: this costs me less than $3 to make enough for four meals, and it’s way better than store-bought. That sugar cut the acidity just right, and the soy sauce stretches to flavor everything from eggs to roasted chicken—no waste, all win.
Step-by-step instructions for Chang's sauce recipe
This sauce comes together faster than you can say "stir-fry" - bold, balanced, and ready in minutes.
Toast the Sesame Seeds and Minced Garlic
In a small dry skillet over medium heat, toast the 1 tablespoon sesame seeds for 1-2 minutes until they turn a rich golden brown and release their nutty aroma. Watch them closely - they'll darken quickly. Immediately transfer them to a small bowl and set aside, reserving the skillet for the next step.
In the same skillet (no need to clean it - those flavorful bits matter), add the 3 cloves minced garlic and cook for 30 seconds until fragrant but not browned. The garlic should smell sweet and pungent - this is your signal it's ready. Remove from heat and let cool for 1 minute before adding to your sauce mixture.
Create the Sauce Base
In a medium saucepan, combine the 0.5 cup light soy sauce, 0.25 cup rice vinegar, 2 tablespoons granulated sugar, 2 tablespoons sesame oil, and 0.25 cup water. Stir well to dissolve the sugar completely - you should see it fully integrate into the liquid. Place the saucepan over medium heat and bring to a gentle simmer.
Simmer for 3-4 minutes until the sugar dissolves and the mixture reduces slightly. You'll notice the sauce becoming slightly thicker and more concentrated. This reduction step intensifies all the flavors - don't rush it. If you see any sugar crystals clinging to the sides, use a wooden spoon to gently scrape them back into the sauce.
Thicken and Finish the Sauce
In a small bowl, whisk together the 1 teaspoon cornstarch with 2 tablespoons water until completely dissolved. This creates your thickening agent. Slowly pour this mixture into the simmering sauce while stirring constantly with a wooden spoon.
Continue cooking for 1-2 minutes until the sauce reaches your desired consistency - it should coat the back of a spoon smoothly without being gluey. The sauce should be glossy with a velvety texture. If it's still too thin, add another ½ teaspoon cornstarch mixed with 1 teaspoon water and cook for another 30 seconds.
Combine and Garnish
Remove the sauce from heat and stir in the toasted sesame seeds and minced garlic you prepared earlier. The sauce should take on a beautiful golden hue from the seeds. Taste and adjust seasoning if needed - you might want to add a touch more soy sauce for saltiness or rice vinegar for acidity.
For best results, let the sauce sit at room temperature for 5 minutes before using. This allows all the flavors to meld together perfectly. The sauce should be aromatic, slightly sweet, tangy, and umami-rich with a perfect balance of all components. Serve immediately over your favorite stir-fry or noodles for maximum flavor impact.
Pro Tips For Making Chang'S Sauce
- Minced, Not Chopped: DESCRIPTION: Grab a knife and actually mince that garlic—tiny, even bits. I learned this the hard way after using rough chunks that left a weird texture and missed spots. Chang’s sauce relies on garlic dissolving completely, so take the 30 seconds to get it right.
- Warm the Oil First: DESCRIPTION: Heat the sesame oil in the pan for 10 seconds before adding garlic—just until it shimmers. Cold oil burns garlic faster, and you’ll end up with bitter smoke instead of nutty aroma. Trust me, your sauce will taste richer if you skip the initial sizzle shock.
- Sugar Last, Not First: DESCRIPTION: Add the sugar after the garlic cooks, not at the start. I used to toss it in early, and it’d caramelize too fast, making the sauce cloyingly sweet. Stir it in at the end—just until dissolved—and balance the flavors properly.
- Vinegar First, Soy Sauce Second: DESCRIPTION: Pour the rice vinegar into the pan before the soy sauce—let it cook down for 30 seconds to mellow its sharpness. Then add the soy sauce. This prevents a harsh tang and lets the umami develop smoothly. (Yes, even if you’re impatient like me.)
Storing and reheating your chang's sauce
Fridge Storage Basics
Transfer your Chang's sauce to an airtight glass container—I prefer Pyrex with a snap-on lid—and store it in the refrigerator at 40°F or below. The sauce actually improves as it sits, with flavors melding beautifully over 3-5 days.
The cornstarch helps maintain its glossy texture, but give it a quick stir before using to redistribute any settled sesame seeds. 💧
Freezer Preservation
For longer storage, freeze the sauce in ice cube trays—perfect for single-use portions. Once frozen, transfer the cubes to a ziplock freezer bag and flatten to save space. This method preserves the sauce for up to 3 months without losing flavor or texture.
When ready to use, thaw overnight in the fridge or quickly in a bowl of warm water for 5 minutes.
Reheating Like a Pro
Gently reheat the sauce in a small saucepan over low heat, stirring constantly to prevent scorching. If the sauce thickens too much, add 1 teaspoon water at a time until it reaches a smooth, glossy consistency.
Never microwave—it destroys the delicate balance of flavors. For best results, reheat just until warm, then let it sit for 2 minutes before using. 🔥
Reviving Thickened Sauce
If your sauce thickens beyond use after refrigeration, don’t toss it! Stir in 1 tablespoon warm water and heat gently until smooth. The cornstarch slurry helps maintain stability, but a little extra liquid brings it back to perfection.
I’ve revived sauces this way even after 7 days—just adjust gradually to avoid thinning it out completely.
Garnish Refresh
Before serving, top with toasted sesame seeds and a drizzle of sesame oil to restore that restaurant-quality finish. The seeds add crunch and aroma, while the oil enhances the nutty depth. Pro tip: Toast fresh seeds in a dry pan for 30 seconds before adding—they’ll smell like heaven. ✨
Sauce Stability Tips
Avoid storing the sauce in metal containers—acidic ingredients like vinegar can react with metal over time. If you must use metal, opt for stainless steel and never leave it for more than 3 days.
For maximum shelf life, freeze half the batch immediately after making it. Trust me, you’ll always have a backup for takeout cravings! 💡
Nutrition facts
Frequently asked questions
Can I make Chang's sauce without cornstarch?
The cornstarch creates that signature glossy texture, but you can skip it for a thinner, more liquid sauce. Use 1 tablespoon water instead of the cornstarch slurry and simmer for an extra 2-3 minutes to reduce the sauce naturally. The flavor will still be rich, but it won't coat the back of a spoon as thickly.
How do I adjust the sweetness or tanginess?
Start with the recipe as written, then taste and adjust. For more sweetness, add ½ teaspoon sugar at a time. Need extra tang? Add ½ teaspoon rice vinegar. Remember, flavors meld as the sauce sits—adjust gradually to avoid overpowering the balance. The sauce should taste slightly sweet, tangy, and umami-rich, not cloying or overly sour.
What’s the best way to use leftover sauce?
Leftover Chang's sauce is perfect for marinades, stir-fry glazes, or dipping sauces. Use it to baste proteins like chicken or tofu while grilling, or drizzle over noodles and rice dishes. For extra flavor, stir in 1 teaspoon grated ginger or ½ teaspoon chili paste before using. The sauce keeps well for up to 7 days in the fridge, so don’t hesitate to experiment!
Why did my sauce turn cloudy or separate?
Cloudiness or separation usually happens if the sauce sits too long without stirring or if the cornstarch wasn’t fully dissolved. Gently reheat the sauce over low heat, stirring constantly until smooth. If it’s still grainy, whisk in 1 teaspoon warm water to help emulsify it. Avoid high heat—it can break down the sauce’s delicate balance.
Can I substitute dark soy sauce for light soy sauce?
Dark soy sauce will give your sauce a deeper color, but it’s much saltier and less delicate. Use only ¼ cup dark soy sauce instead of the full ½ cup light soy sauce, and reduce the sugar to 1 tablespoon to balance the intensity. The flavor will be richer but slightly more bitter. For a compromise, mix ¼ cup light soy sauce with ¼ cup dark soy sauce and adjust to taste.