
Desserts
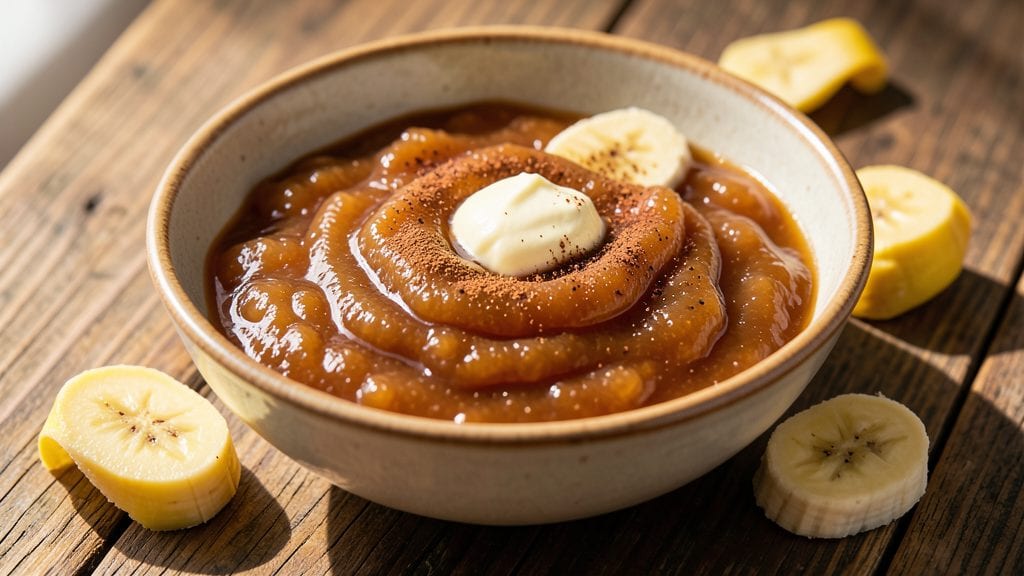
This old-fashioned banana jam recipe brings back the comforting flavors of childhood—warm cinnamon, buttery vanilla, and perfectly ripe bananas transformed into a velvety spread. The secret lies in slow cooking with just sugar and spices, creating a jam that’s naturally thick and rich without needing commercial pectin.
I’ve perfected this version over years of testing, ensuring it stays spreadable yet holds its shape beautifully on toast or scones.
The process is simpler than you’d expect: ripe bananas simmered with sugar and a pinch of citric acid until thick and fragrant, then finished with vanilla and cinnamon for that classic old-fashioned touch. No fancy equipment needed—just a heavy-bottomed pot and patience.
The result is a jam with a deep golden hue and a texture that’s smooth yet just slightly chunky, where you can still taste the natural sweetness of the bananas.
This versatile spread works as a breakfast staple, a dessert topping, or even a filling for pastries—its warm spices make it perfect for holiday gatherings or cozy mornings. Unlike store-bought versions, this jam develops richer flavors over time, improving as it sits.
Store it in the fridge for up to 2 weeks or can it for long-term preservation, though I always keep a jar handy for quick toast toppings.
For those who love customization, you can adjust the spice level or add a splash of lemon juice for brightness, but the classic version—just bananas, sugar, and vanilla—is what makes it truly special. Let’s get started on creating a jar that’ll taste like home.
Ingredients for old fashioned banana jam
Eight simple ingredients transform ripe bananas into velvety, spiced jam with no pectin needed.
| Ingredient | Amount | Notes |
|---|---|---|
| Ripe Bananas 🍌 | 3 cups | Mashed, overripe preferred |
| Granulated Sugar 🍚 | 2 cups | White or light brown |
| Citric Acid 🍋 | ¼ tsp | Brightens flavor, optional |
| Pure Vanilla Extract 🌿 | 1 tbsp | High-quality, not imitation |
| Ground Cinnamon 🌶️ | 1 tsp | Freshly ground preferred |
| Unsalted Butter 🧈 | 1 tbsp | Full-fat for richness |
| Lemon Juice 🍋 | 1 tbsp | Freshly squeezed, optional |
| Water 💧 | ½ cup | For thinning if needed |
The bananas are the heart of this jam—overripe (those with brown spots) pack the most natural sweetness and create that classic old-fashioned texture. Buy organic bananas if you can, or use whatever’s spotted on your counter. Sugar is non-negotiable here; Domino or C&H work perfectly, but avoid powdered sugar. Citric acid is optional but worth the tiny cost—it brightens the flavor and mimics the tang of commercial jams. For the vanilla, Nielsen-Massey or McCormick Pure extract makes all the difference—imitation just won’t cut it. The butter? Full-fat only—it adds that luxurious mouthfeel and balances the sweetness beautifully.
No citric acid? A pinch of cream of tartar works in a pinch, or skip it entirely—just know the flavor will be slightly milder. Short on vanilla? Almond extract at half the amount gives a similar depth, though the flavor profile shifts. Want more warmth? Add a pinch of nutmeg or cardamom to the spices. The lemon juice is optional but trust me on this—it cuts through the sweetness and keeps the jam from tasting cloying. If your jam thickens too fast, add water 1 tbsp at a time until it reaches that perfect spreadable consistency. And if you’re worried about burning, keep the heat low—this isn’t a race.
This jam tastes even better the next day as the flavors meld. Store in an airtight jar in the fridge for up to 2 weeks, or can it for long-term storage—I always keep a jar in the pantry for quick toast toppings. The butter adds richness, so if you’re avoiding dairy, use coconut oil instead, though the texture will be slightly firmer. For a holiday gift, package it in small jars with a ribbon—it’s always a hit. And if you make extra? Freeze portions for up to 6 months—just thaw overnight in the fridge before using.
Why You'll Love This Recipe
- No Peel, No Stress: I swear by overripe bananas—no peeling required. Just mash them straight into the pot, and the sugar does the rest while you sip coffee and pretend you’re not actually cooking.
- Sweet-Tart Magic: That little pinch of citric acid? It’s the secret to a jam that’s not too cloying, not too bland—just perfectly balanced with vanilla and cinnamon warmth. Honestly, it’s the kind of flavor that makes you reach for more toast.
- Breakfast to Dessert: Slather it on pancakes, stir it into yogurt, or drizzle it over ice cream—this jam works everywhere. I’ve even used it to glaze ham (yes, really), and it’s become my go-to for quick, no-fuss flavor boosts.
- Lasts All Month: One batch feeds my family for weeks, and the citric acid keeps it fresh longer than store-bought. Plus, the sugar’s cheap, so you’re not breaking the bank for something this versatile and delicious.
Step-by-step instructions for warm spice and buttery vanilla banana jam
This old-fashioned banana jam delivers rich, velvety texture with warm cinnamon and buttery vanilla notes—perfect for toast, scones, or yogurt.
Mash the Bananas and Combine Wet Ingredients
In a medium saucepan, mash the 3 cups ripe bananas until completely smooth with no lumps—overripe bananas work best as they're naturally sweeter and softer. Add the 1 tablespoon lemon juice and 0.25 teaspoon citric acid, then stir gently to brighten the flavor and prevent browning. I like to press the bananas through a fine-mesh sieve at this stage for an ultra-smooth texture, though a fork works if you prefer rustic texture.
Next, add the 1 tablespoon unsalted butter and 0.5 cup water, then place the pan over medium heat. Let the mixture warm for 3-4 minutes, stirring occasionally, until tiny bubbles form around the edges and the butter melts completely. This step ensures all ingredients blend seamlessly before adding the sugar.
Cook the Sugar Mixture to Soft Ball Stage
Increase heat to medium-high and gradually whisk in the 2 cups granulated sugar until fully dissolved. The mixture will foam vigorously—this is normal. Once dissolved, insert a candy thermometer and cook without stirring until the temperature reaches 235°F (soft ball stage). This takes about 15-20 minutes and is critical for achieving that perfect jam consistency.
Watch for the moment when the sugar syrup begins to thicken noticeably—it'll pull away from the sides of the pan and coat the back of a spoon. If you don't have a candy thermometer, test by dropping a small amount into cold water: it should form a soft, pliable ball that holds its shape when removed.
Incorporate Spices and Vanilla for Depth of Flavor
Remove the pan from heat and immediately stir in the 1 teaspoon ground cinnamon and 1 tablespoon pure vanilla extract. The cinnamon should dissolve completely—if you see any specks, return the pan to low heat for 30 seconds to fully incorporate. This is where the warm spice notes develop their signature aroma, so don't rush this step.
Return the pan to medium-low heat and simmer gently for 5-7 minutes, stirring frequently, until the jam thickens to a spreadable consistency. You'll know it's ready when it coats the back of a spoon smoothly and leaves a distinct track when you run your finger through it. The jam should be thick enough to hold its shape on a plate but still glisten slightly.
Test for Doneness and Finish
Transfer the jam to a clean glass jar or bowl and let it cool for 10 minutes at room temperature. While cooling, perform the classic "plate test": spoon a small amount onto a chilled plate and refrigerate for 5 minutes. If it wrinkles slightly when you push it with your finger, it's perfect. If it's too runny, return it to low heat and cook for another 2-3 minutes, stirring constantly.
Once cooled, the jam should have a velvety texture with a glossy sheen. The aroma should be rich with banana, warm cinnamon, and buttery vanilla notes. Store in an airtight container in the refrigerator for up to 2 weeks or process in a water bath for long-term storage. This jam pairs beautifully with buttery toast, pancakes, or even as a filling for pastries.
Pro Tips For Making Old Fashioned Banana Jam
- MASH, DON’T CHOP: Grab a fork and crush those ripe bananas into a thick, lumpy puree—no blender needed. I used to slice them first, but the extra liquid from chopped bananas dilutes the jam, making it runnier than it should be.
- SUGAR FIRST, HEAT LATER: Sprinkle all the sugar over the mashed bananas before adding liquid, then stir like you’re trying to win a pie-eating contest. This dissolves the sugar faster and prevents grainy spots later—trust me, you’ll taste the difference.
- SKIP THE BOILING FIT: Once the jam starts bubbling, turn the heat down to a gentle simmer. I learned this after watching my first batch turn into banana syrup—too much heat caramelizes the sugar too fast, and you lose that bright, balanced flavor.
- VANILLA LAST, CINNAMON FIRST: Whisk in the cinnamon early so it blooms and deepens the flavor, but save the vanilla until the very end—adding it too soon makes the aroma fade faster. (Yes, even if you’re impatient like me.)
Pro cooking tips for old fashioned banana jam
Heat Control Secrets
Old-fashioned banana jam thrives on gentle, consistent heat—never rush the cooking process. I use medium-low to medium heat throughout to prevent burning while ensuring the sugar fully dissolves. The key moment is when you reach 235°F (soft ball stage)—this is where the magic happens.
If your pan has hot spots, stir occasionally to distribute heat evenly. A heavy-bottomed saucepan (like All-Clad or Le Creuset) prevents scorching and gives you better temperature control. 🌡️
Banana Mashing Mastery
Overripe bananas with black spots are non-negotiable for authentic flavor, but how you mash them matters. For ultra-smooth jam, press them through a fine-mesh sieve to remove any fibrous bits. If you prefer rustic texture, mash with a fork—but be thorough, as any lumps will remain visible.
I like to add the lemon juice and citric acid right away to brighten the flavor and prevent browning during cooking. This step also helps break down the banana's natural pectin, which aids in thickening. 🍌
Sugar Dissolution Tricks
Whisking the sugar into the banana mixture gradually is crucial—dumping it all at once creates grainy spots. Once dissolved, the mixture will foam vigorously, which is normal. If you see undissolved sugar crystals, stir vigorously or return to low heat for 1-2 minutes to fully incorporate.
A candy thermometer is worth the investment here—it ensures you hit that precise 235°F target without guessing. Without one, the "cold water test" works, but it's less precise. ⚡
Spice Integration Tips
The cinnamon and vanilla should be added off the heat to prevent burning. Stir immediately to distribute the spices evenly—any specks left undissolved will create bitter pockets in your jam.
For extra depth, I like to toast the cinnamon in a dry pan for 30 seconds before adding it, but this is optional. The vanilla extract should be high-quality (like Nielsen-Massey)—imitation vanilla lacks the complexity that makes this jam truly special. 🌿
Thickness Perfection
Achieving the right consistency takes patience. After adding the spices, return the pan to medium-low heat and stir constantly until the jam reaches that spreadable-but-holds-shape texture. The "plate test" is foolproof: spoon a small amount onto a chilled plate, refrigerate for 5 minutes, then push with your finger.
If it wrinkles slightly, it's perfect. If it runs, cook for another 2-3 minutes. Adding water in 1-tbsp increments can help if it thickens too fast. ✨
Butter's Role
The 1 tablespoon unsalted butter isn't just for flavor—it adds richness and helps create that signature velvety texture. Melt it completely into the banana mixture before adding sugar, and stir it in thoroughly.
For a dairy-free version, substitute with coconut oil**, though the texture will be slightly firmer. The butter also helps balance the sweetness, so don't skip it unless you're avoiding dairy. 🧈
Nutrition facts
Frequently asked questions
Why does this banana jam recipe use overripe bananas?
Overripe bananas with brown spots are packed with natural sugars and break down more easily, creating a richer, smoother texture without needing extra sweetener. Their deeper flavor also gives the jam that classic old-fashioned depth. Plus, they're often cheaper and reduce food waste!
Can I make this banana jam without citric acid?
Yes, but your jam will have a slightly milder flavor. Citric acid brightens the taste and helps preserve freshness. As a substitute, use ¼ teaspoon cream of tartar or add an extra 1 tablespoon lemon juice. The jam will still turn out well, just with a more subtle tang.
How do I know when the jam is done?
Use the plate test: spoon a small amount onto a chilled plate, refrigerate for 5 minutes, then push with your finger. If it wrinkles slightly, it's perfect. Without a thermometer, watch for the 235°F (soft ball stage) when the mixture pulls away from the pan edges. The jam should coat the back of a spoon smoothly but still glisten.
Can I use honey instead of sugar?
While possible, honey changes the texture and flavor dramatically. It doesn't dissolve as cleanly and can create a grainier jam. If you must substitute, use 1½ cups honey and reduce the water to ¼ cup, but expect a thicker, more liquid consistency. For authentic results, stick with granulated sugar.
How long will homemade banana jam last?
Store in an airtight container in the fridge for up to 2 weeks. For longer storage, process in a water bath for canning (shelf life of 1 year). Frozen portions keep for 6 months—thaw overnight in the fridge before using. The flavors actually improve with time, so make extra!