Side Dishes
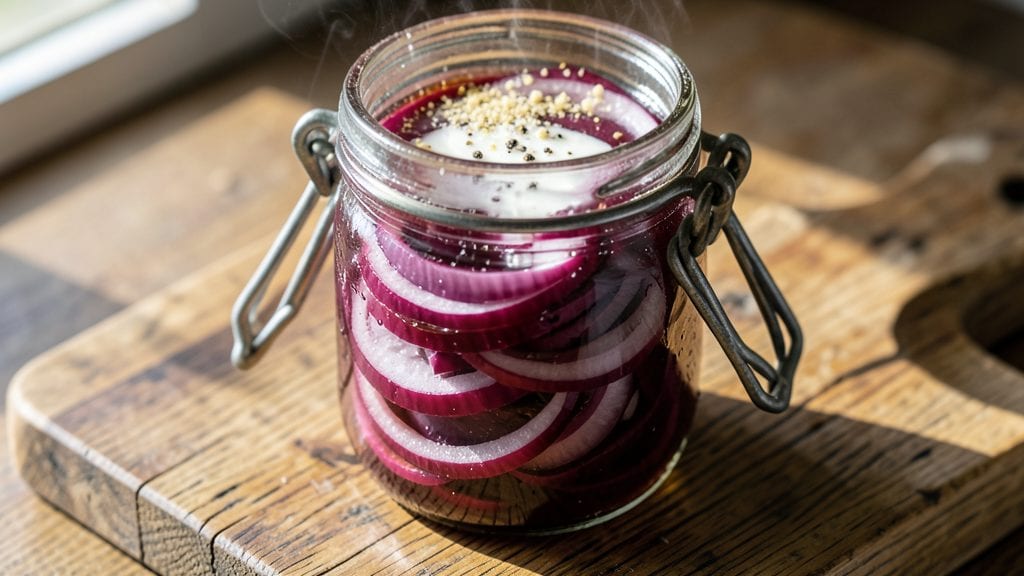
This basic pickled red onion recipe transforms sharp onions into tangy, crunchy bites that elevate any dish with minimal effort. The vinegar brine preserves their vibrant color while infusing them with bright acidity—perfect for topping tacos, salads, or burgers without overpowering flavors.
I’ve tested this method countless times, and it consistently delivers restaurant-quality results in just 20 minutes of active prep.
The secret lies in balancing vinegar, sugar, and salt to create a brine that tenderizes the onions while keeping them crisp.
A pinch of garlic powder and black pepper adds subtle depth, but the real magic happens when the onions soak for at least 4 hours—long enough for the flavors to meld without losing texture. This recipe yields 2 cups of pickled onions, enough to garnish multiple meals.
What you’ll end up with is a jar of glossy red onions with a tangy bite that cuts through rich dishes and brightens fresh salads. The onions stay crisp for up to 2 weeks in the fridge, making this a versatile pantry staple.
Whether you’re prepping for a week of meals or adding a quick garnish, these pickled onions are a game-changer.
Use them on tacos, sandwiches, or even pizza—just drain and pat dry before serving. The versatility is what makes this recipe a kitchen essential. Let’s get started with the full instructions!
Ingredients for basic pickled red onion
Seven simple ingredients transform sharp red onions into tangy, restaurant-quality bites perfect for any dish.
| Ingredient | Amount | Notes |
|---|---|---|
| Red Onions 🧅 | 2 cups | Thinly sliced, 1/4-inch thick |
| White Vinegar 💧 | 1 cup | Distilled or apple cider |
| Granulated Sugar 🍚 | ½ cup | White or light brown |
| Salt 🧂 | 1 tbsp | Kosher or sea salt |
| Garlic Powder 🧄 | ½ tsp | Freshly ground preferred |
| Black Pepper 🌶️ | ¼ tsp | Freshly cracked |
| Water 💧 | 1 cup | Filtered or bottled |
The red onions must be fresh and firm—avoid any with soft spots or sprouting. Trader Joe's or Whole Foods often carry the sweetest varieties, but your local grocery store's standard red onions work fine. Thinly slice them evenly (about 1/4-inch thick) for consistent pickling. For best results, use onions within 1 week of purchase. The vinegar should be white vinegar or apple cider vinegar—avoid balsamic or wine vinegar, as their flavors will overpower the delicate onion taste. Sugar is crucial for balancing acidity; light brown sugar adds subtle caramel notes if you prefer.
No white vinegar? Apple cider vinegar or rice vinegar work equally well. Running short on sugar? Honey or agave nectar at the same amount will work, though the texture may vary slightly. The garlic powder and black pepper are optional but add depth—skip if you dislike strong flavors. For a spicier kick, add a pinch of red pepper flakes. If you're prepping for a crowd, double the recipe but ensure your jar is sterilized and airtight to prevent spoilage. The onions can be sliced ahead and stored in the fridge for 2 days before pickling.
Once pickled, store in an airtight glass jar in the fridge for up to 2 weeks. The onions stay crisp for the first week but soften slightly after. For longer storage, transfer to a freezer-safe container and freeze for up to 6 months. Always drain onions before serving to avoid sogginess. These pickled onions elevate tacos, sandwiches, and salads—just pat dry with a paper towel before using to remove excess brine.
Why You'll Love This Recipe
- Five-Ingredient Magic: I swear by this—just onions, vinegar, sugar, salt, and garlic powder. That’s it. No fancy tools, no waiting for special ingredients to arrive. Honestly, I’ve made this in a mason jar while chatting on the phone.
- Crisp-Tangy Bite: The vinegar cuts through the sweetness of the sugar, and that garlic powder? It lingers just enough to make every bite feel like a little flavor punch. Not too sweet, not too sour—just right, like a perfect balance.
- Taco Night Hero: Between us, this is my go-to for tacos, burgers, or even a quick salad topper. I keep a jar in the fridge so I can grab it anytime. My kids ask for it more than the actual meat sometimes—(yes, even on a Tuesday night).
- Lasts for Weeks: One batch feeds my family for breakfast, lunch, and dinner for days. The onions keep their crunch, and the vinegar mix stays potent. I’ll be real: I’ve had jars sitting for months, and they’re still good. Budget-friendly? Absolutely.
Step-by-step instructions for making vinegar-bright pickled red onions
Follow this precise method to create tangy, crisp pickled onions that stay crunchy for weeks.
Prepare and Slice the Red Onions
Start by peeling the red onions and carefully slicing them into ¼-inch thick rings. I use a sharp chef's knife and cut the onions in half from top to bottom first—this creates a stable base for even slicing. You should yield about 2 cups of thin slices. The thinner the slices, the quicker they'll pickle and the more uniform the texture will be.
Place the sliced onions in a large bowl and set aside. The key here is to work efficiently—once you start the pickling liquid, time becomes critical. I like to slice all onions first to avoid partial pickling. If you're working with particularly large onions, you may need to adjust your slicing technique slightly to maintain even thickness throughout.
Combine Vinegar, Sugar, and Seasonings
In a separate medium saucepan, combine the 1 cup white vinegar, 0.5 cup granulated sugar, 1 tablespoon salt, 0.5 teaspoon garlic powder, and 0.25 teaspoon black pepper. Bring this mixture to a gentle boil over medium heat, stirring constantly until all ingredients dissolve completely. You'll notice the sugar dissolving first, followed by the salt and spices.
Once boiling, reduce the heat to low and let it simmer for 5 minutes. This simmering time ensures all the sugar and salt fully incorporate, creating a balanced brine. The mixture should be clear with no visible sugar crystals remaining. If you see any undissolved sugar, stir vigorously for another 30 seconds to dissolve it completely.
Add Water and Prepare the Pickling Liquid
Remove the pan from heat and carefully stir in the 1 cup water. Let the mixture cool to room temperature—this typically takes about 20-30 minutes. The liquid should be warm but not hot when you add it to the onions, as hot liquid can cause the onions to soften too quickly and lose their crisp texture.
While waiting for the liquid to cool, perform a quick taste test. The mixture should be pleasantly tart with a subtle sweetness and just a hint of garlic and pepper. If it tastes too sweet, you can add a pinch more salt. If it's too strong, add a splash more water to balance the flavors. This is your pickling liquid, so getting it right at this stage ensures perfect flavor development.
Pack and Seal the Pickled Onions
Once the pickling liquid has cooled to room temperature, pour it over the sliced onions in the bowl. Stir gently to ensure all onion slices are fully coated. Transfer the onions and liquid to a clean, quart-sized mason jar or airtight container, pressing down lightly to remove any air bubbles. The onions should be completely submerged in the liquid—this prevents mold growth and maintains crispness.
Seal the jar tightly and store it in the refrigerator. The onions will begin pickling immediately, but they'll develop their best flavor after at least 24 hours. For maximum crispness and flavor, I recommend letting them pickle for 3-5 days before using. The longer they sit, the more tangy and complex the flavor becomes, though they'll remain usable for up to 3 months in the fridge.
Test for Doneness and Use
After 24 hours, taste a slice to check the flavor. The onions should be tangy with a pleasant crunch—no longer raw or sharp. If they taste too mild, return them to the fridge for another 12-24 hours. The pickling process continues even after the initial 24-hour period, so don't rush it.
Use these pickled onions immediately or store them in the fridge for up to 3 months. They'll add bright acidity and texture to tacos, sandwiches, salads, or any dish that needs a tangy crunch. The onions should remain crisp and vibrant in color. If you notice any softening or discoloration, discard them immediately as these are signs of spoilage.
Pro Tips For Making Basic Pickled Red Onion
- Slice Thin, Even Layers: I learned this the hard way—uneven slices mean some onions stay crunchy while others turn mushy. Aim for ⅛-inch thickness, and work in batches if needed. A sharp chef’s knife makes this faster, but if you’re using a mandoline, keep your fingers clear (yes, even if you’re impatient like me).
- Boil Vinegar First: Sugar dissolves better in hot vinegar, not room temp. Heat the vinegar to a gentle simmer for 2 minutes before adding sugar and salt—this cuts clumping and speeds up flavor infusion. Skip this, and you’ll end up with grainy bits at the bottom.
- Don’t Crowd the Jar: Tightly packed onions trap air and slow pickling. Loosely pack them, then press down gently to remove air bubbles. If using a wide-mouth jar, this also makes it easier to fish out slices later without a mess.
- Add Garlic Powder Last: Sounds weird, but it works: Stir in garlic powder after the mixture cools slightly (but is still warm). This prevents it from clumping into a pasty lump. A pinch of black pepper or red pepper flakes here also makes a real difference—just toss them in at the same time.
Regional styles of this basic pickled red onion
Mexican Taco Topping
This is how I first fell in love with pickled red onions—they’re a must-have for tacos, especially al pastor or carne asada. The tangy crunch cuts through the richness of marinated meats perfectly.
I like to drain the onions on a paper towel for 5 minutes before adding them to tacos, so they don’t make the tortillas soggy. For extra flavor, I toss them with ½ teaspoon lime juice right before serving. 🌮
Southern-Style BBQ
In the American South, pickled red onions are a classic BBQ topping, especially on pulled pork sandwiches. I’ve seen them served at famous spots like Franklin Barbecue in Austin. The key here is to use apple cider vinegar instead of white vinegar for a milder, fruitier tang.
Add ¼ teaspoon smoked paprika to the brine for a subtle smoky note that pairs beautifully with BBQ sauce. Serve them on top of pulled pork or in a pimento cheese sandwich for a Southern twist.
German Sauerkraut Twist
For a unique variation, I’ve adapted this recipe to mimic the tang of German sauerkraut but with the crunch of fresh onions. Replace half the vinegar with ½ cup sauerkraut juice (from a jar) and add ½ teaspoon caraway seeds to the brine.
The onions develop a deeper, fermented flavor while keeping their texture. This works wonderfully as a topping for bratwurst or pretzels, or even mixed into mashed potatoes for a tangy kick.
French Bistro Garnish
In French bistros, pickled red onions often grace dishes like steak frites or croque monsieur. For a bistro-style version, I add 1 teaspoon Dijon mustard and ½ teaspoon thyme to the brine. The onions take on a more complex, herbaceous flavor that pairs beautifully with rich beef dishes.
Serve them on top of a baguette sandwich with melted Gruyère cheese or alongside a classic bœuf bourguignon for an authentic touch. 🍷
Indian Chutney Fusion
For a bold fusion, I blend the pickled onions into a red onion chutney by adding 1 tablespoon mint chutney and ½ teaspoon cumin seeds to the brine. The onions develop a spicy, herby flavor that’s perfect for drizzling over chicken tikka masala or naan pizza.
For extra heat, add ½ teaspoon cayenne pepper to the brine. This fusion is inspired by the street food of Mumbai, where tangy and spicy flavors dominate.
Japanese Sushi Rice Topping
In Japan, pickled red onions are often used as a topping for sushi rice or onigiri. For this variation, I reduce the sugar to ¼ cup and add ½ teaspoon rice vinegar and ¼ teaspoon sesame seeds to the brine.
The onions stay crisp and add a bright contrast to the mild rice. Serve them on top of sushi rolls or mixed into okonomiyaki batter for a Japanese-inspired twist. 🍣
Nutrition facts
Frequently asked questions
Can I use yellow or white onions instead of red?
While red onions are traditional for their vibrant color and mild sweetness, you can substitute yellow or white onions. The flavor will be slightly sharper and less colorful, but the pickling process works the same. For best results, use 1 cup of thinly sliced yellow onions—just be aware the final product will lack the classic red hue.
How long do I need to pickle the onions before using them?
The minimum pickling time is 4 hours for a basic tangy flavor, but they develop best after 24 hours in the fridge. For maximum crispness and depth of flavor, let them sit 3-5 days. The longer they pickle, the more complex the taste becomes—just don't exceed 3 months for optimal texture.
Why did my pickled onions turn mushy?
Mushy onions usually mean they weren't fully submerged in the brine or were stored too long. Always ensure onions are completely covered by liquid, and use them within 2 weeks for best texture. If you notice softening after 1 week, transfer to a freezer-safe container and freeze for up to 6 months to preserve crispness.
Can I make this recipe without sugar?
Yes, but the flavor will be more acidic and less balanced. Sugar helps tenderize the onions and counteracts the vinegar's sharpness. If omitting, reduce vinegar to ¾ cup and add ½ teaspoon citric acid (found in canning sections) to mimic the brightening effect. The onions will still pickle but may taste more tart.
What are the best dishes to use these pickled onions on?
These versatile pickled onions shine on tacos, burgers, and sandwiches, but they also elevate salads, grain bowls, and even pizza. For maximum crunch, drain and pat dry before adding to dishes. Try them on carne asada tacos, pulled pork sandwiches, or as a topping for steak frites. The tangy crunch cuts through rich or fatty foods beautifully.